How to Crochet Hat in Any Size free pattern & tutorial
How to Crochet Basic Hat in Any Size – free pattern & tutorial.
If you can’t figure it out how to crochet hat in any size you want, this tutorial with lots of helpful charts is great for you understand how to do it.
In this post, we are talking about crocheting any size hat from top to down. How to get exactly crown width, circumference, and length to fit the hat size you want.
It’s all about math, but like a magic. Finally, you will get a proper size hat. I have added a hat sizing guide so you do not need to play with math. And lots of step by step photos, infographic. 🙂
Disclosure This blog contain affiliate links.
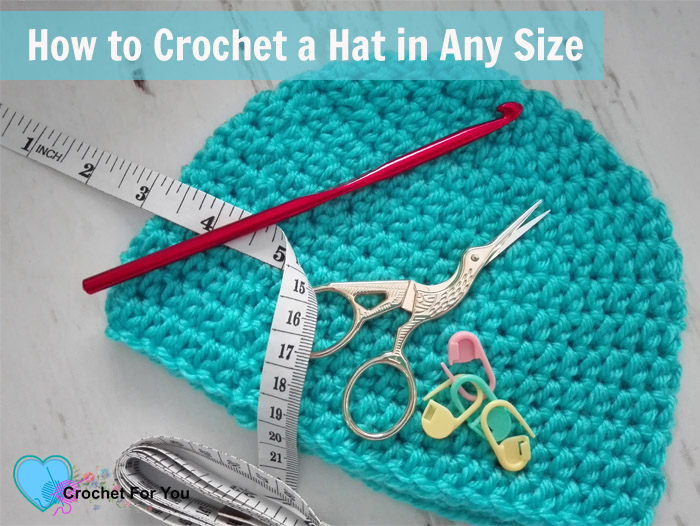
Save on Pinterest
This tutorial and free pattern for a basic crochet hdc hat.
To make a proper size hat, the materials you’re going to use and measurements for the hat is really important.
Let’s start with the materials.
Materials you will need
DK / Worsted or any weight of yarns you wish to use and recommended hook size for the yarn weight you selected (see the label of the selected yarn or follow the guidelines of Standard Yarn Weight System.
I used
- Red Heart Soft – Turquoise (#4-Medium / Worsted)
- US I-9, 5.5mm crochet hook.
And other essential materials and tools like
- Scissors
- Stitch markers
- Measuring tape and
- Yarn needle for weaving ends.
There are two ways (maybe more methods than two) but these are the popular way to crochet a hat.
You can start to crochet a hat from
- top to down.
- bottom up.
In this tutorial, we use top to down method.
How to get the measurements to crochet a hat?
You may have a difficult time when it comes to crochet a hat with the proper size. Right!. I also have struggled with this process when I began to crochet. These guidelines on Creating Beautiful Things in Life was very helpful to me.
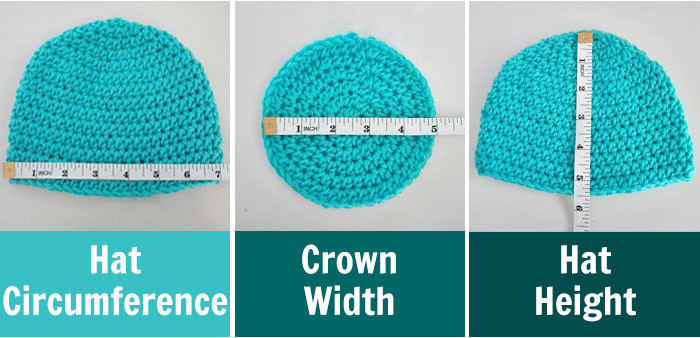
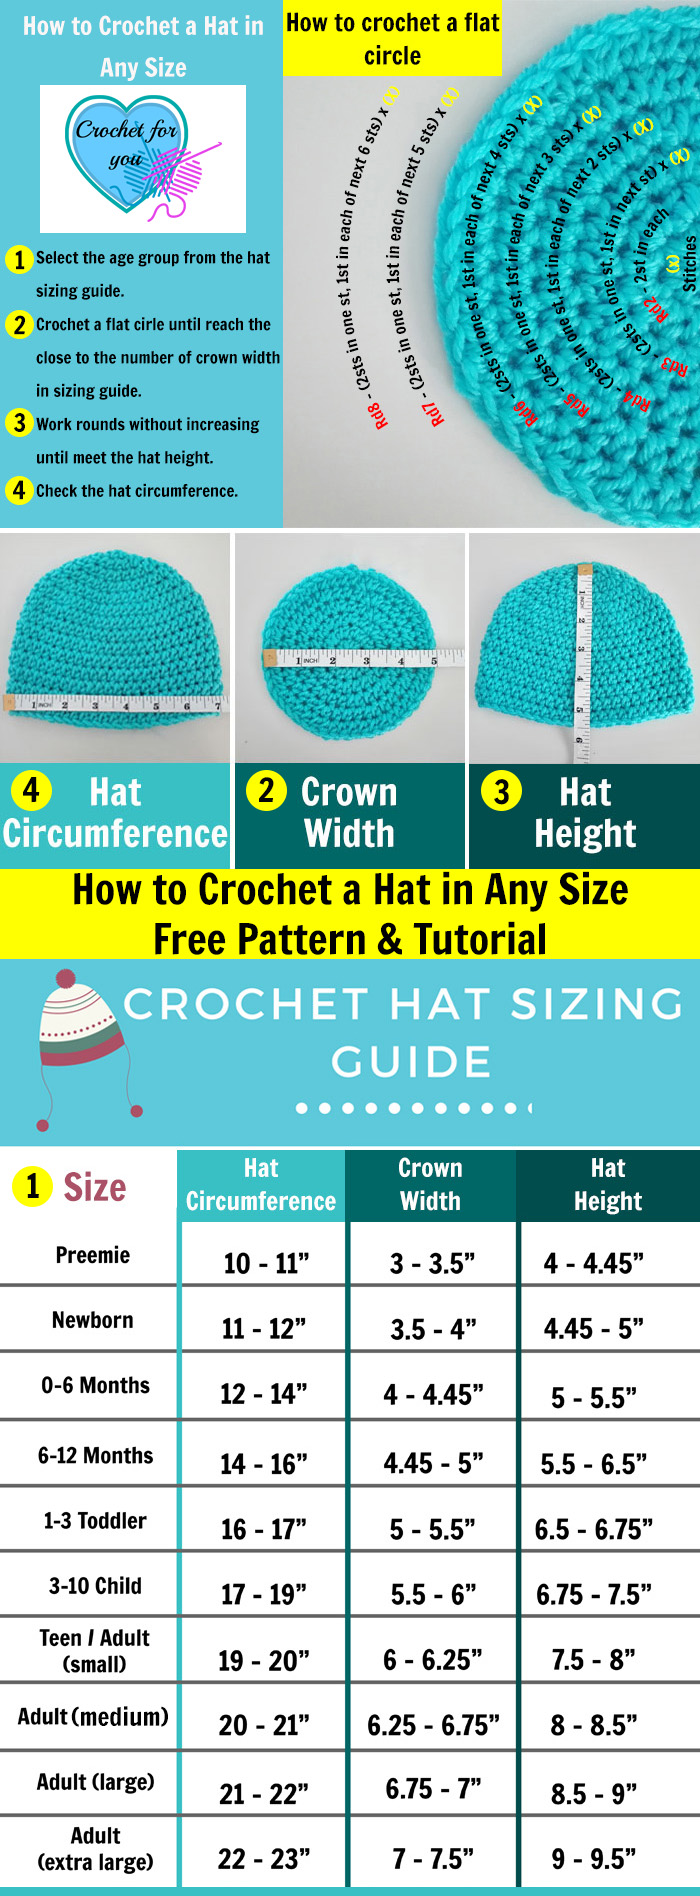
Here are the main parts and its measurements you need to know before starting to crochet a hat. (if you are unable to get measurements of the person, follow the guidelines below. (Crochet Hat Sizing Guide)
To get
- Hat circumference = measure around the head just above ears and subtract one inch for a nicely fitted finished hat.
- Crown width = (this is a flat circular top of the hat) you need to divide hat circumference by 3.14 (pi).
- Hat height = Head circumference / 10 x 4.
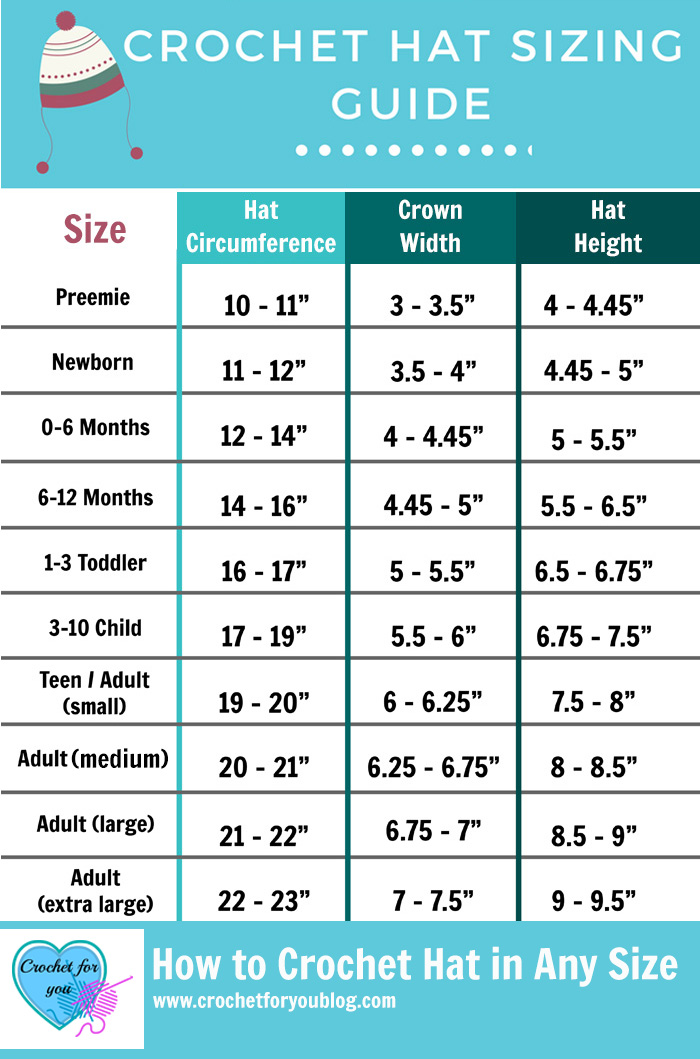
Follow the Hat Sizing Guide
Here I put together hat sizing guide. The shown hat circumferences in this chart are after subtracting one inch for a nicely fitted finished hat. If you are unable to get measurements of the person, select the age group from the chart below and try to get the close number of sizes in each crown width, hat height, and circumference of the age group.
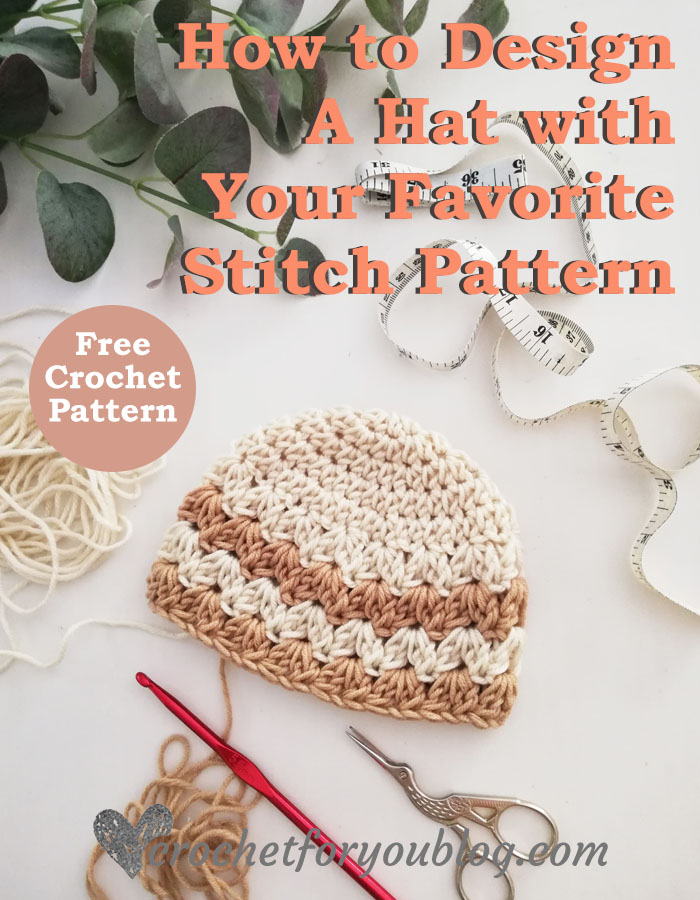
Want to make a hat with a beautiful crochet texture?
I have a tutorial and free pattern to show you how to design a top down hat with your favorite stitch pattern.
See how to
Crochet Cluster V Stitch Baby Hat
Let’s start to crochet a hat! 🙂
First, you need to make a magic ring. Or crochet chain 5 or 6 and slip stitch to the first chain to make a ring.
Remember
You can start the first round with total numbers of 5, 6, 8, 10, and 12. These numbers of stitches may different due to the yarn weight and stitches you use.
For this baby hat, I crocheted 8 half double crochet stitches with #4-Medium / Worsted weight yarn. If you select #5-Bulky weight yarn, 6 half double crochet stitches for the first round enough to make a flat circle.
In this post, I wrote here a free pattern for a baby hat (6-12 months).
Crown
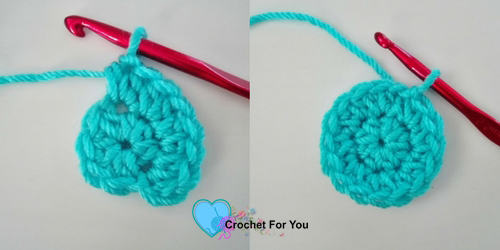
Round 1: chain 1 (does not count as a stitch), 8 half double crochet into the ring, join with slip stitch in first stitch. (8 stitches).
(In each round, you will see how increasing by the number of total stitches of the first round.)
Round 2: chain 1 (does not count as a stitch), 2 half double crochet in first stitch and each of next stitch around, join with slip stitch in first stitch. (16 stitches)
Round 3: chain 1 (does not count as a stitch), 2 half double crochet in first stitch, * half double crochet in next stitch, 2 half double crochet in next stitch; repeat * from around, join with slip stitch in first stitch. (24 stitches)
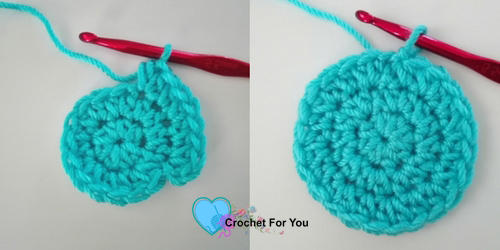
Round 4: chain 1 (does not count as a stitch), 2 half double crochet in first stitch, * half double crochet in each of next 2 stitches, 2 half double crochet in next stitch; repeat * from around, join with slip stitch in first stitch. (32 stitches)
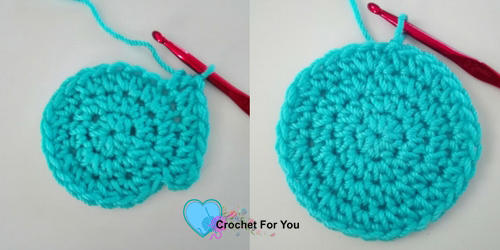
Round 5: chain 1 (does not count as a stitch), 2 half double crochet in first stitch, * half double crochet in each of next 3 stitches, 2 half double crochet in next stitch; repeat * from around, join with slip stitch in first stitch. (40 stitches)
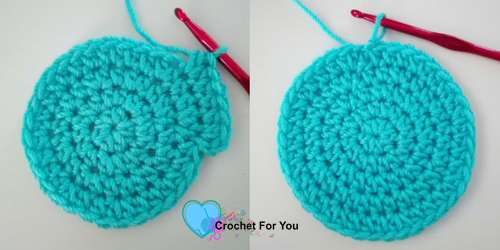
Round 6: chain 1 (does not count as a stitch), 2 half double crochet in first stitch, *half double crochet in each of next 4 stitches, 2 half double crochet in next stitch; repeat * from around, join with slip stitch in first stitch. (48 stitches)
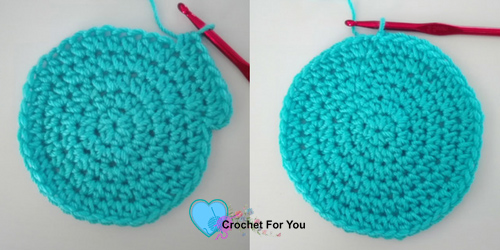
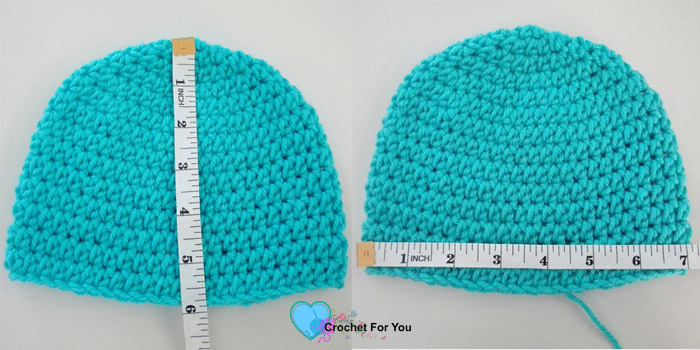
At this point crown completed for 6-12 size = 4.45″ diameter of my circle.
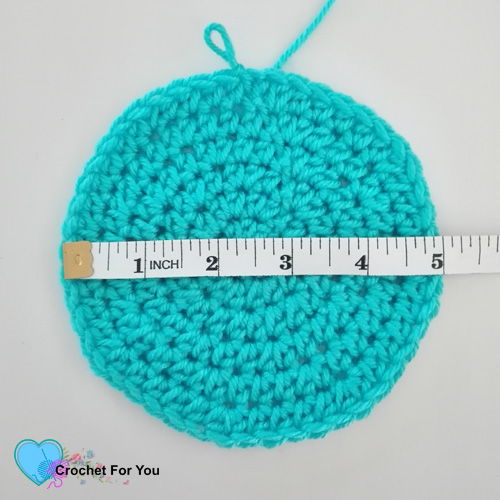
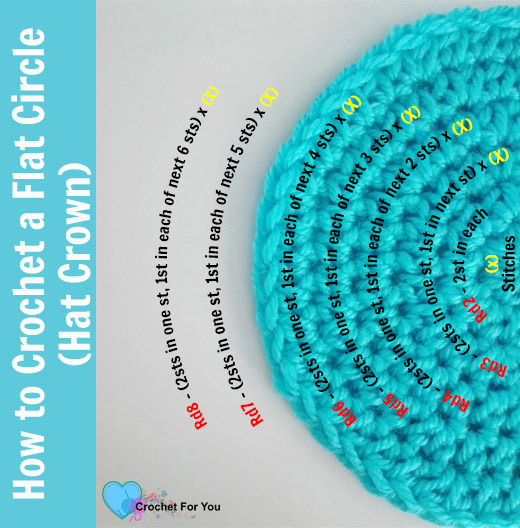
Follow this pattern until you reach the diameter you want for other sizes.
For an example.
(2 half double crochet in one stitch, half double crochet in each of next 5 stitches).
(2 half double crochet in one stitch, half double crochet in each of next 6 stitches). Like this. (See the photo above How to Crochet a Flat Circle – Hat Crown)
After you get the close number to the size of the crown width you want. Continue the rounds without increasing until you reach the hat height you need.
For this baby hat, I crocheted more 8 rounds without increasing.
Round 7 to 14: make half double crochet in each stitch around, join with slip stitch in first stitch. (48 stitches)
That’s all! 🙂
Hope to see you soon with a new FREE pattern
Until then, Happy Crocheting!!
Share your finished projects of this pattern on Crochet For You FB page.
Happy hooking with Crochet For You!!
Let’s connect and share
Facebook | Pinterest | Twitter | Instagram
All contents include photography and patterns are copyrighted Crochet For You by Erangi Udeshika.
Do not copy, edit, distribute or republish patterns and images in this blog in part or whole as your own. Please, share a direct link to the pattern with others and anywhere else. You are welcome to make and sell finished items using my patterns.
Visit Copyright / Terms of use for more info.
Thank you.

5 Comments
Sheltie Times
Great tutorial. I especially liked the charts for the sizing.
Christie
I love this tutorial. It is my go-to when I am making a beanie. In the last 3 days in between chores and errands, I have made three perfectly fitting beanies for some cold heads, and I just want to keep making them!! Thank YOU!!
Patti
THANK YOU! This is the most comprehensive tutorial on making hats that I have come across. I’ve been making hats to donate for a few years now, and have to refer to several sets of instructions (as well as my own scribbled notes) for sizes, measurements, stitch counts etc. Here it is all in one place. Thank you thank you thank you!
Nethucrafts
A perfect tutorial for those who struggle making the right size hat for their needs. For beginners who struggle making crochet rounds, you can follow the traditional way of making a crochet rectangle and make a hat out of that which I shareda tutorial on my site.
margot
FANTASTIC! With this information, I can crochet a beanie with any wool and with any size hook. I don’t have to worry about gauge at all. That is the freedom I wanted. I’m going to approach other projects with this same philosophy. Thanks thanks thanks!