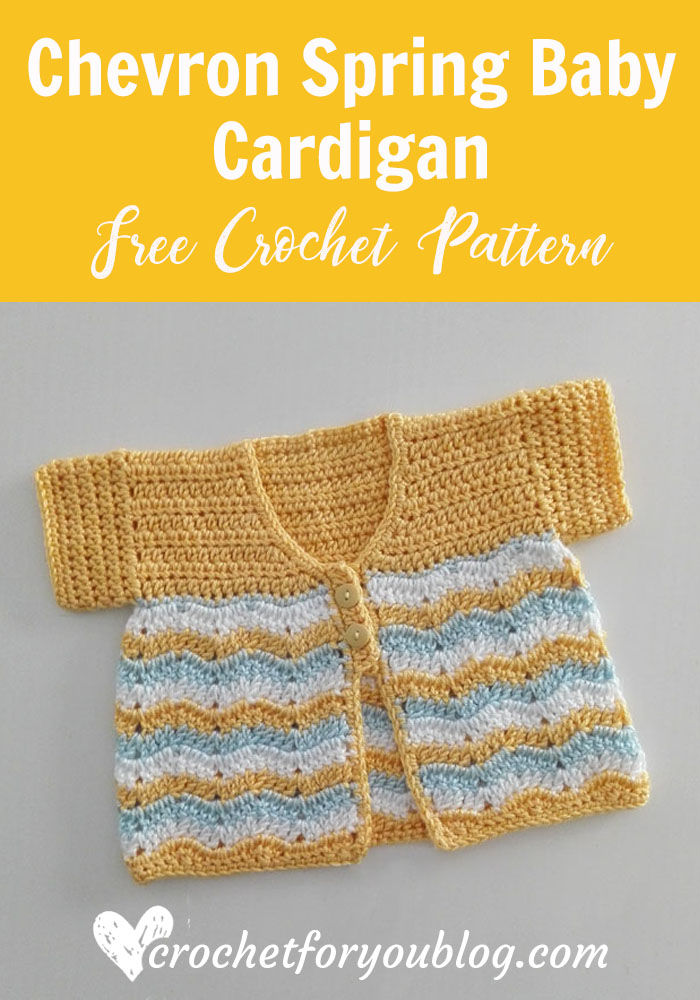
Crochet Chevron Spring Baby Cardigan Free Pattern
Crochet Chevron Spring Baby Cardigan Pattern By Crochet For You.
Hello everyone! Today I’m sharing a pretty and easy crochet baby cardigan pattern. I just want to say my friend this is my one of favorite crochet baby cardigan pattern I made.
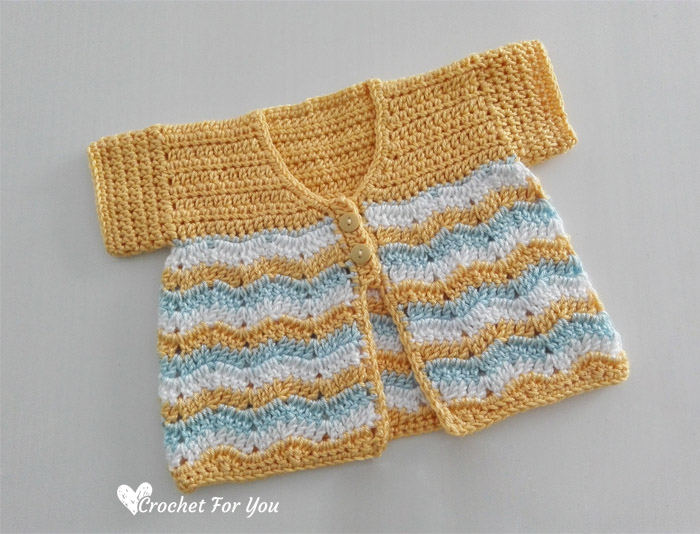
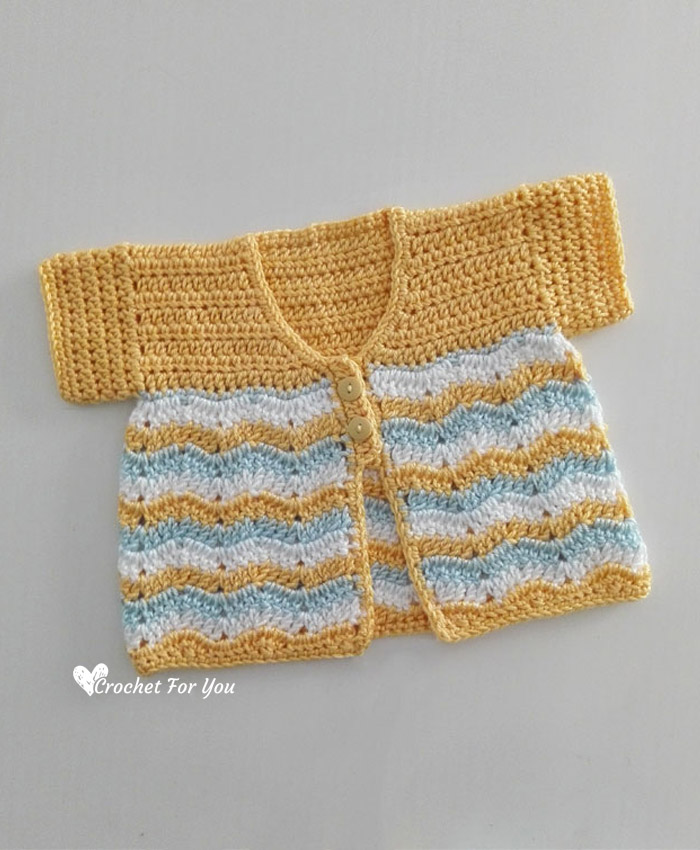
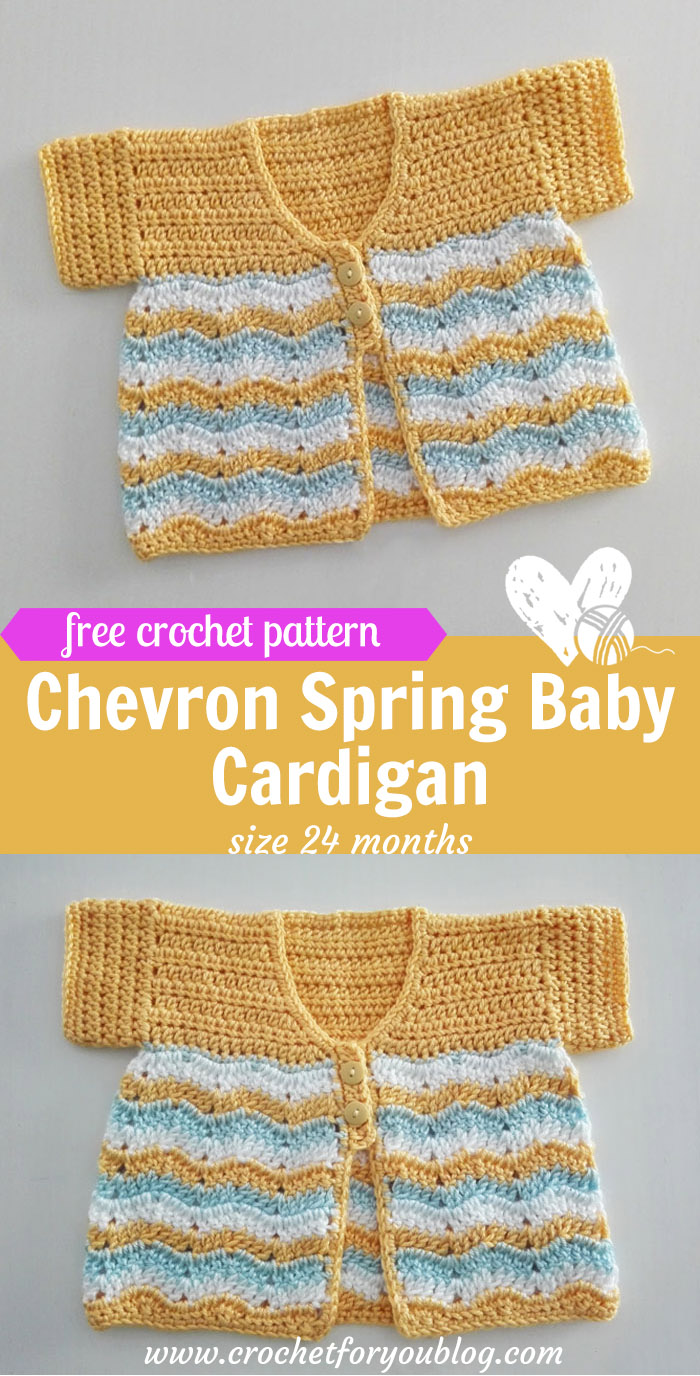
This Chevron Spring Baby Cardigan is a simple pattern with chevron crochet. I think this baby cardigan has a cute look with short sleeves. What do you think? If you want long sleeve cardigan, see the note section below. Also, this baby cardigan looks great with any color combo. I love these pastel colors on Caron Simply Soft. 🙂
Disclosure This blog contain affiliate links.
Add this pattern to Ravelry queue
Skill Level: Easy
Finished size: (24 months)
- Chest 20″
- Height shoulder to bottom = 11″
Materials:
Materials (I used)
4-Medium / Worsted / 100% Acrylic / approx: 300 yards
(I used)
- Caron Simply Soft in 3 colors – (Amazon affiliate) White (approx: 60 yards), Sunshine (approx: 180 yards), Soft blue (approx: 60 yards)
- H-8 / 5mm crochet hook
- 3 buttons 0.75″
- Sewing thread and needle
- Stitch markers
- Scissors
Gauge: 13 sc x 14 rows = 4″ with H-8 / 5mm crochet hook
Abbreviations
- ch = chain
- sl st = slip stitch
- sc = single crochet
- hdc = half double crochet
- dc = double crochet
- st = stitch
- sk = skip
- beg = beginning
- ch-sp = chain space
- (RS) = Right Side
- (WS) = Wrong Side
- (C1) = Color 1
- (C2) = Color 2
- (C3) = Color 3
- *to = repeat * to the instructions.
Special stitches
- dc2tog = [Yarn over, insert the hook in next stitch, yo, pull back through the stitch, yo, pull back through first 2 loops on the hook] 2 times, yo, pull back through all the loops on the hook.
- v-st = (dc, ch 2, dc) in indicated st.
- 2-dc cluster = [Yarn over, insert the hook in next stitch, yo, pull back through the stitch, yo, pull back through first 2 loops on the hook, skip next st, yarn over, insert the hook in next stitch, yo, pull back through the stitch, yo, pull back through all the loops on the hook.
- 3dctog = [Yarn over, insert the hook in next stitch, yo, pull back through the stitch, yo, pull back through first 2 loops on the hook] 3 times, yo, pull back through all the loops on the hook.
Notes:
- beg ch does not count as st.
- I made this cardigan with short sleeves. If you want to make long sleeves repeat round 2 on sleeve section until the desired length and follow the edging for sleeves.
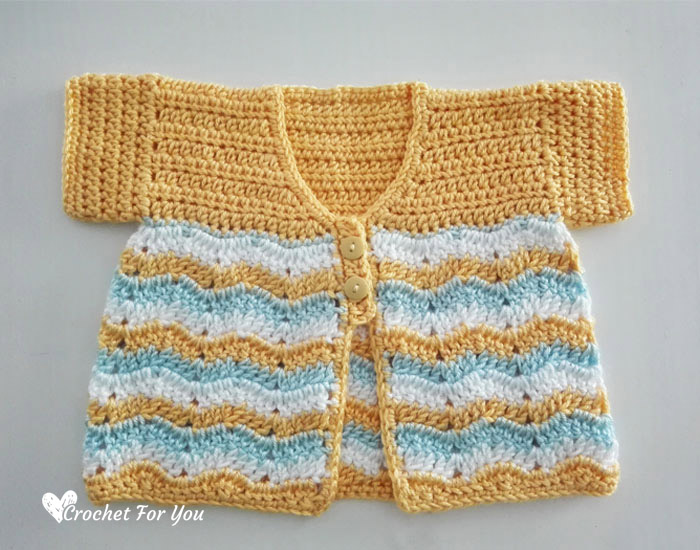
Chevron Spring Baby Cardigan Pattern
Top part.
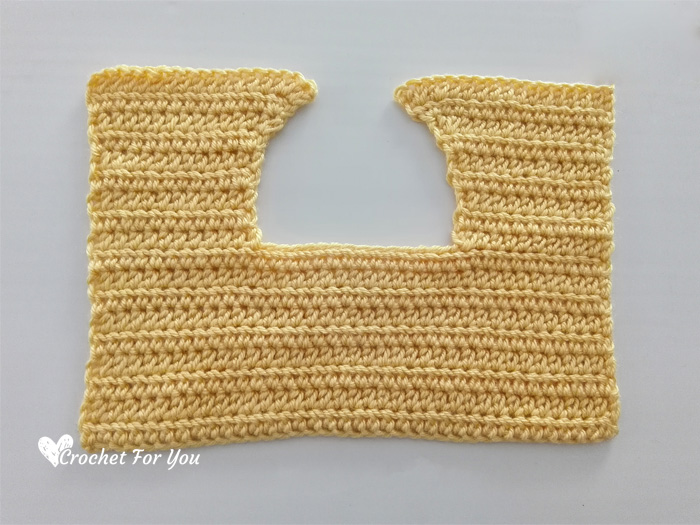
Back panel
With (C1), crochet ch 36+1
Row 1: hdc in the second ch from the hook, hdc in each st across, turn. (36 sts)
Row 2: ch 1, hdc in first st and each st across, turn. (36 sts)
Row 3 to 9: repeat row 2. Do not fasten off or cut the yarn. Turn to make one side panel for the front.
First front panel
Row 1: (RS) ch 1(does not count as st), hdc in first st and each of next 10 sts, turn. (11 sts)
Row 2: (WS) ch 1(does not count as st), hdc in first st and each st across, turn. (11 sts)
Row 3: (RS) repeat row 2.
Row 4: (WS) ch 1(does not count as st), 2 hdc in first st, hdc in each st across, turn. (12 sts)
Row 5: (RS) repeat row 2. (12 sts)
Row 6: (WS) ch 1(does not count as st), 2 hdc in first st, hdc in each st across, turn. (13 sts)
Row 7: (RS) ch 1(does not count as st), hdc in first st and each of next 11 sts, 2 hdc in last st, turn. (14 sts)
Row 8: (WS) ch 1(does not count as st), 2 hdc in first st, hdc in each st across, turn. (15 sts)
Row 9: (RS) ch 1(does not count as st), hdc in first st and each of next 12 sts, 2 hdc in each of next 2 sts, turn. (17 sts) Fasten off.
Second front panel
Skip next 14 sts of back panel. Join the yarn at the next st.
Row 1: (RS) ch 1, hdc in same st and each of next 10 sts, turn. (11 sts)
Row 2: (WS) ch 1, hdc in first st and each st across, turn. (11 sts)
Row 3: (RS) repeat row 2.
Row 4: (WS) ch 1, hdc in first st and each of next 9 sts, 2 hdc in last st, turn. (12 sts)
Row 5: (RS) repeat row 2. (12 sts)
Row 6: (WS) ch 1, hdc in first st and each of next 10 sts, 2 hdc in last st, turn. (13 sts)
Row 7: (RS) ch 1, 2 hdc in first st, hdc in each of next 12 sts, turn. (14 sts)
Row 8: (WS) ch 1, hdc in first st and each of next 12 sts, 2 hdc in last st, turn. (15 sts)
Row 9: (RS) ch 1, 2 hdc in first st and next st, hdc in each st across, turn. (17 sts) Fasten off.
Bodice
Row 1: (RS) join the (C2) yarn at the open side of the front panel, ch 1, sc in first st, sc in each of next 15 sts, 2 sc in last st of the front panel, 2 sc in first st of the back panel (made an armhole), sc in each of next 16 sts, 2 sc in next st, sc in each of next 17 sts, 2 sc in last st of the back panel, 2 sc in first st of other side front panel (made an armhole), sc in each of next 16 sts, turn. (75 sts)
Row 2: (WS) join (C3) yarn, ch 2 (beg ch does not count as st), dc in first st, dc2tog (see special stitch), 2 dc in next st, v-st in next st, 2 dc in next st, 2-dc cluster (see special stitch), *2 dc in next st, v-st in next st, 2 dc in next st, 2-dc cluster; repeat * to across until last 3 sts remain, dc2tog, dc in last st, turn. (87 dc total)
Row 3: (RS) join (C1) yarn, ch 2 (beg ch does not count as st), dc in first st, dc2tog, dc in each of next 2 sts, v-st in ch-sp, dc in each of next 2 sts, 2-dc cluster, *dc in each of next 2 sts, v-st in next st, dc in each of next 2 sts, 2-dc cluster; repeat * to across until last 3 sts remain, dc2tog, dc in last st, turn. (87 dc total)
Row 4: (WS) repeat row 3 with (C2) yarn.
Row 5: (RS) repeat row 3 with (C3) yarn.
Row 6: (WS) repeat row 3 with (C1) yarn.
Row 7: (RS) repeat row 3 with (C2) yarn.
Row 8: (WS) repeat row 3 with (S3) yarn.
Row 9: (RS) repeat row 3 with (C1) yarn.
Row 10: (WS) repeat row 3 with (C2) yarn.
Row 11: (RS) repeat row 3 with (C3) yarn.
Last row: (WS) ch 2 (beg ch does not count as st), dc in first st, dc2tog, hdc in next st, sc in next st, 2 sc in ch-sp, *sc in next st, hdc in next st, dc3tog, hdc in next st, sc in next st, 2 sc in ch-sp; repeat * to across until last 3 sts remain, dc2tog, dc in last st. (87 sts total)
Do not fasten off, turn the work and start edging
Edging
Row 1: (RS) facing, Bottom edge of the cardigan – ch 1, 3 sc in first st, sc in each st around of the bottom edge, 3 sc in corner st (you need to work 3 sc in 4 corners including this (2 corners on the bottom and 2 corners on the top edge)), open side with around the neck – crochet sc evenly in open sides including around the neck, (do not forget to crochet 3 sc in next 3 corner sts), sl st to the first sc. Fasten off and weave the ends.
Short stripes for add buttons in open sides (make 2 on each sides)

Place stitch markers on 2nd st of 3 st on the top edge corner. Count 9 sts down and place stitch marker.
With (C1), (RS) facing, join the yarn at one of marked st, ch 2, hdc in each st across until next marked st. turn the work, sl st in each st across.
Sew the buttons on one of short stripe using needle and thread.
Sleeves (each side on armholes)
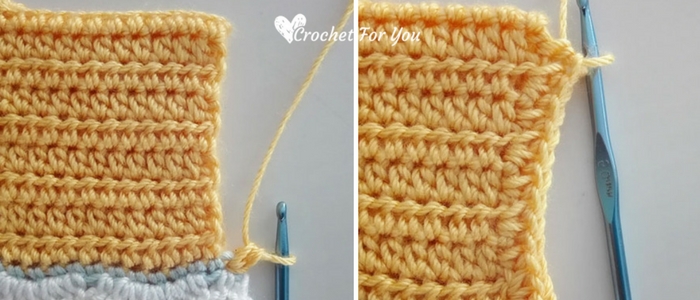
Round 1: (RS) facing, join (C1) yarn at side-sc st of row 1 of the bodice part in underarm, ch 1, hdc in same st, [2 hdc in next side-hdc, 1 hdc in next side-hdc] 9 times, hdc in next next side sc of row 1 of the bodice, sl st to the first st. (29 sts total)
Round 2: ch 1, hdc in first st and each st around, sl st to the first st. (29 sts total)
Round 3 to 4: repeat round 2.
Edging for sleeves
Round 5: ch 1, sc in each st around, st to the first st.
Round 6: repeat round 5. Fasten off and weave the ends.
Hope to see you soon with a new FREE pattern ?
Until then, Happy Crocheting!!
Share your finished projects of this pattern on Crochet For You FB page.
Happy hooking with Crochet For You!!
Let’s connect and share
Facebook| Pinterest | Twitter | Instagram
All contents include photography and patterns are copyrighted Crochet For You by Erangi Udeshika.
Do not copy, edit, distribute or republish patterns and images in this blog in part or whole as your own. Please, share a direct link to the pattern with others and anywhere else. You are welcome to make and sell finished items using my patterns.
Visit Copyright / Terms of use for more info. Thank you.
5 Comments
Pingback:
Pingback:
Fran Davidson
Id like to make this [chevron spring baby cardigan] in a 12 mo or 18 mo size. Do you have a pattern size for those?
Erangi Udeshika
So sorry Fran. Haven’t made other sizes of this baby chevron but right now, I’m working another cardigan for 12M size using cotton yarn. 😀 Hopefully this month, it can be published soon on the blog.
Sylvia Spencer-Inight
Thank you for your beautiful patterns as well as the Cactus Cardy pattern your instructions are just perfect :-))
I crochet baby clothes for the Hospices and Charities here in Auckland NZ so your lovely patterns go to good causes.