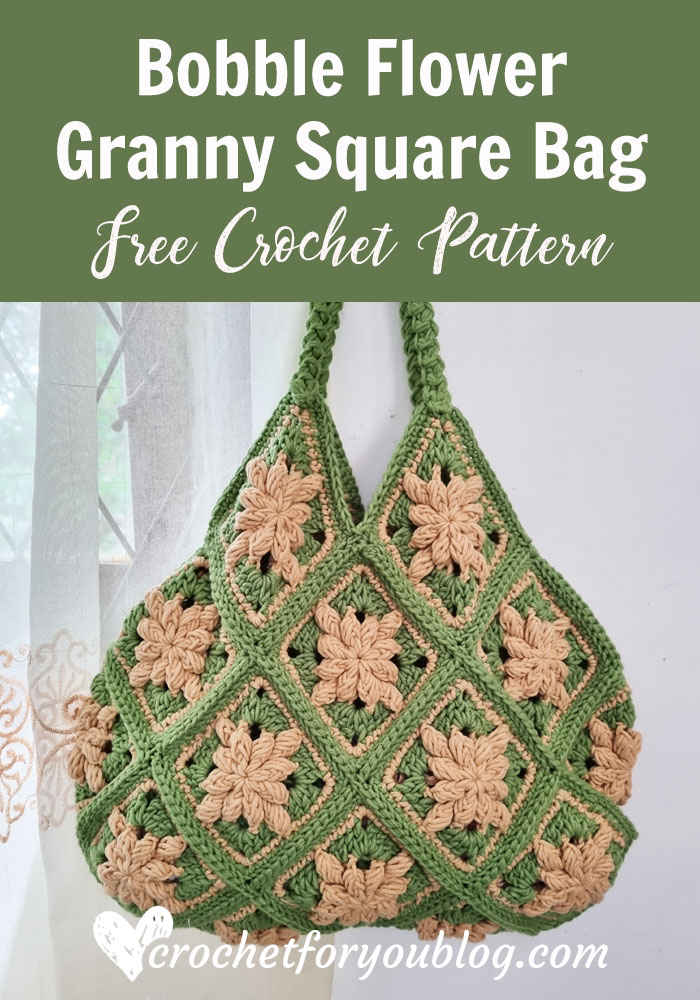
Crochet Bobble Flower Granny Square Bag Free Pattern
Crochet Bobble Flower Granny Square Bag Pattern by Crochet For You
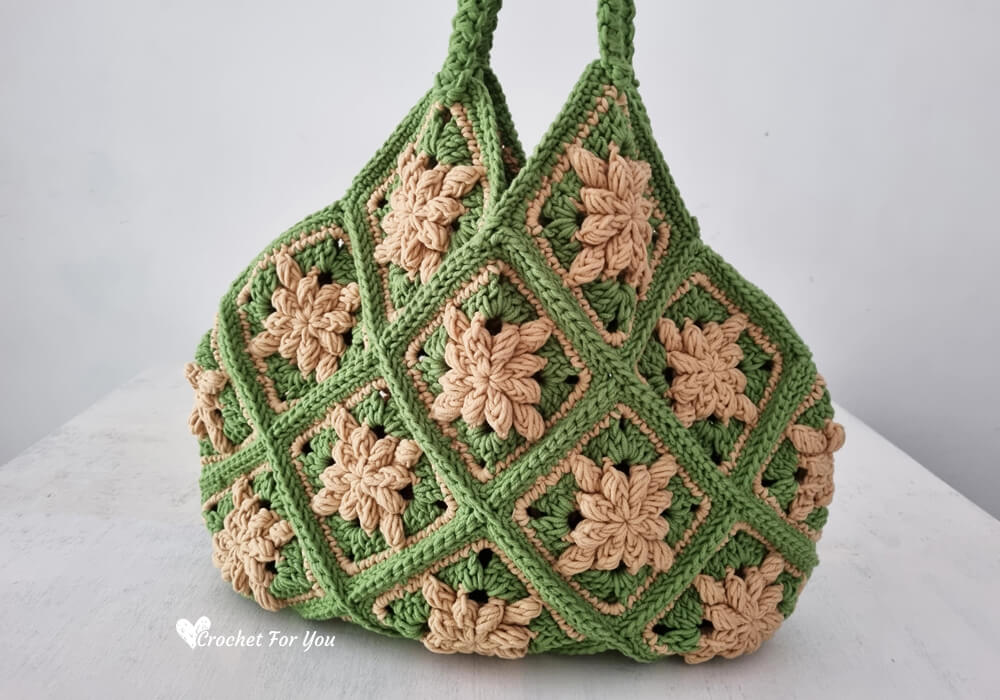
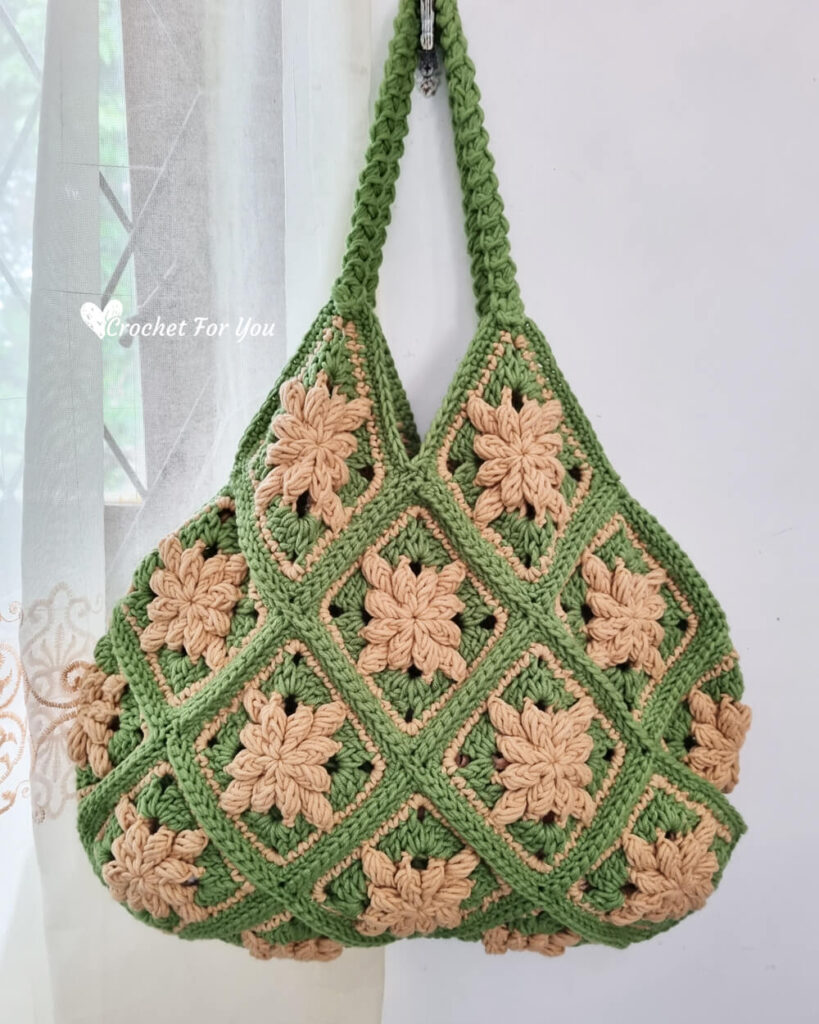
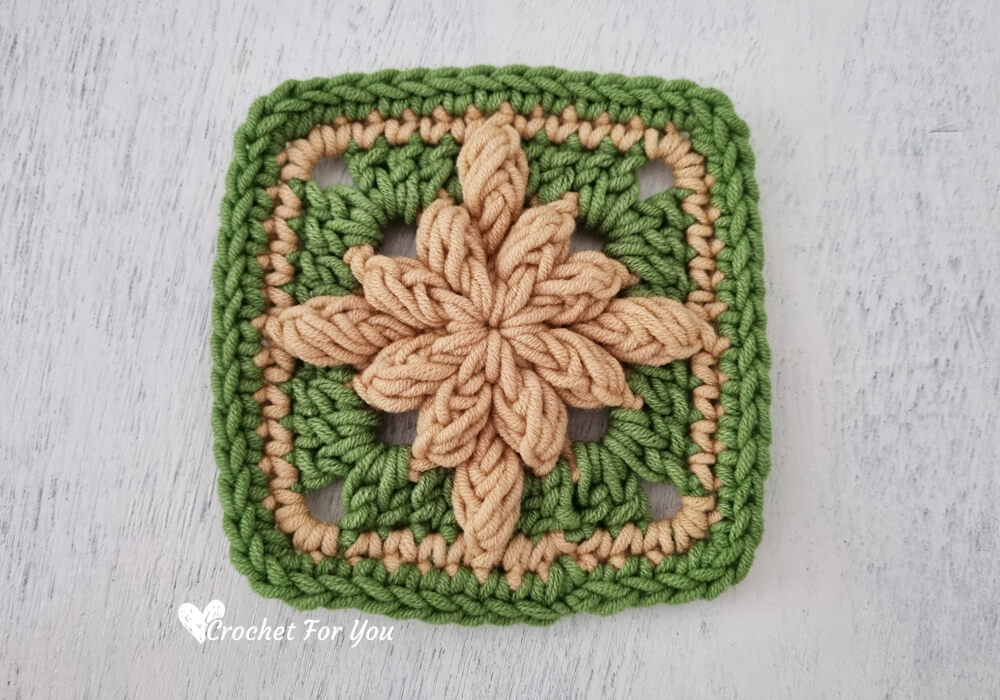
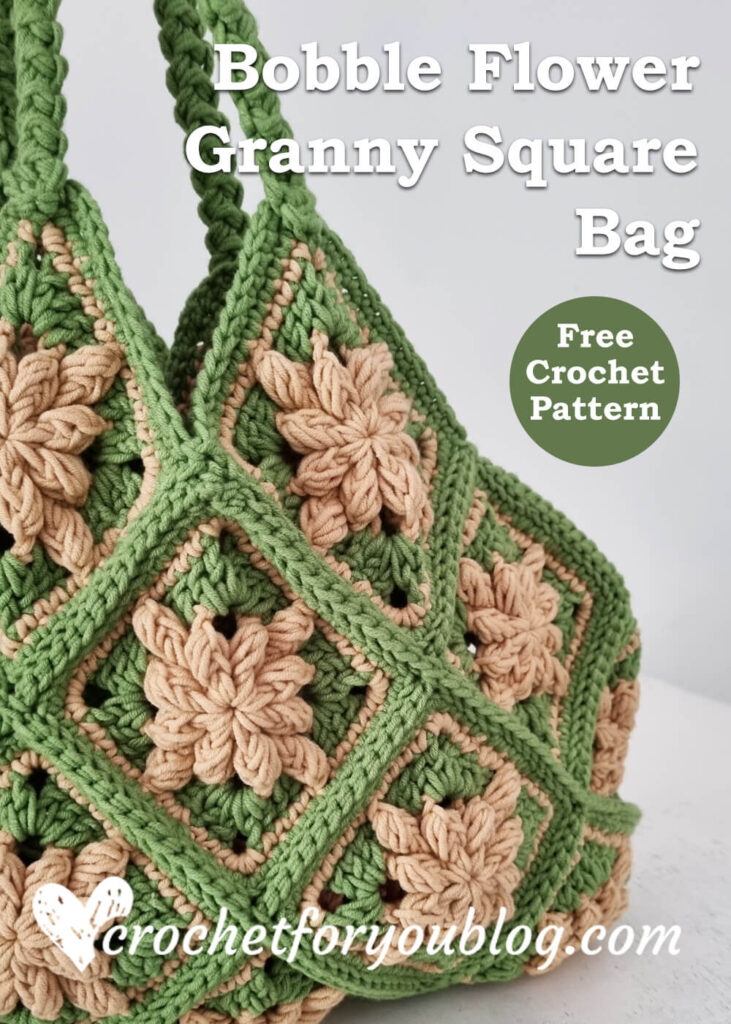
Did you remember the Bobble Drops Granny Square pattern I shared a couple of years ago? This year my Bobble Drops Flower Granny Squares turned into a nice bag.
Disclosure This blog contain affiliate links.
Add this pattern to Ravelry queue
Save on Pinterest
Rustic & Antique feel
Since I release the Bobble Drops Flower Granny Square pattern I planed to make a bag, but I couldn’t decide the colors. These two colors from Ice yarn Lorena Worsted Green and Cafe Latte is perfectly matched with the idea in my mind. These two colors feeling me rustic & antique and the bag is also trendy with granny squares.
The yarn
After crocheting Honeycomb Trellis Modern Tote Bag and the All-Time Favorite Tote Bag I could say Ice yarn Lorena Worsted is my favorite yarns to make crochet bags. It’s strong, sturdy and have beautiful color ways of choice.
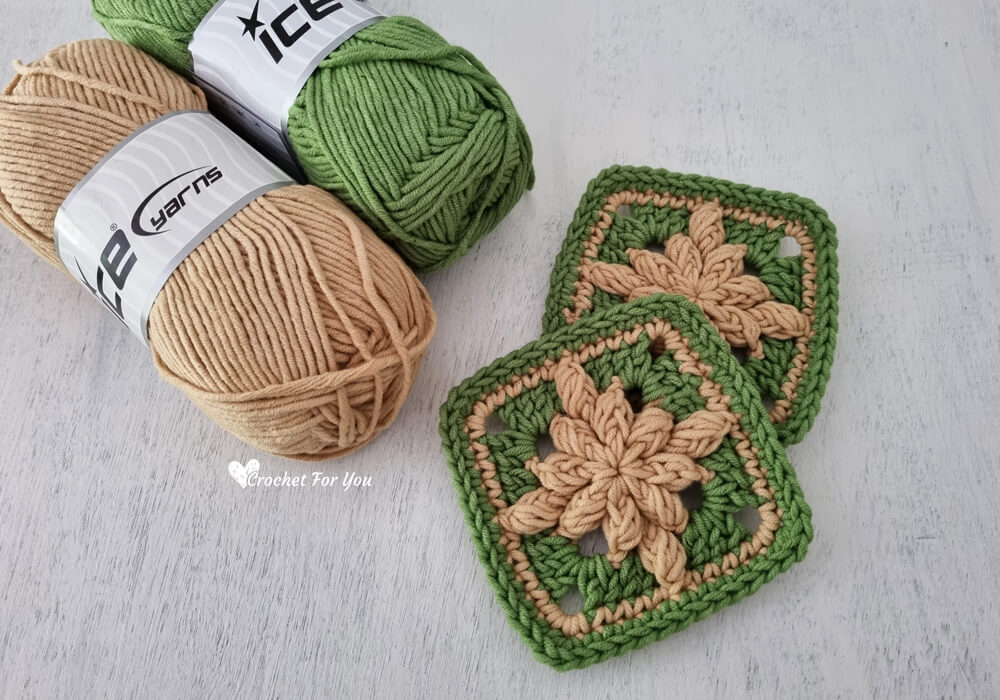
Ice Yarn Lorena Worsted,
4 Medium: Worsted,/Afghan/Aran , 55% Cotton, 45% Acrylic.
How to make a granny square bag?
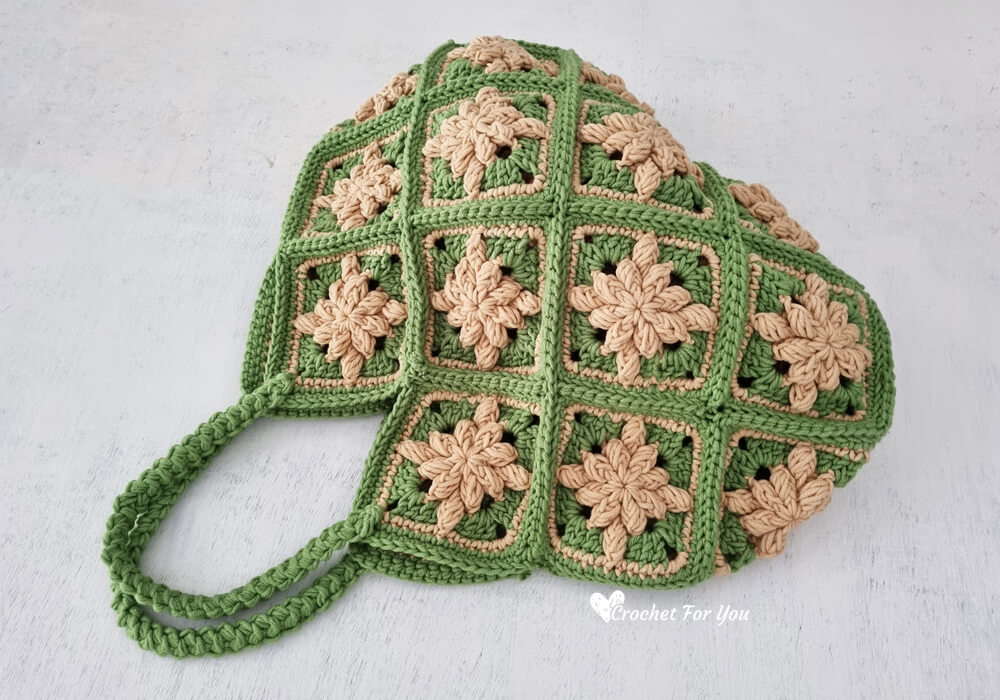
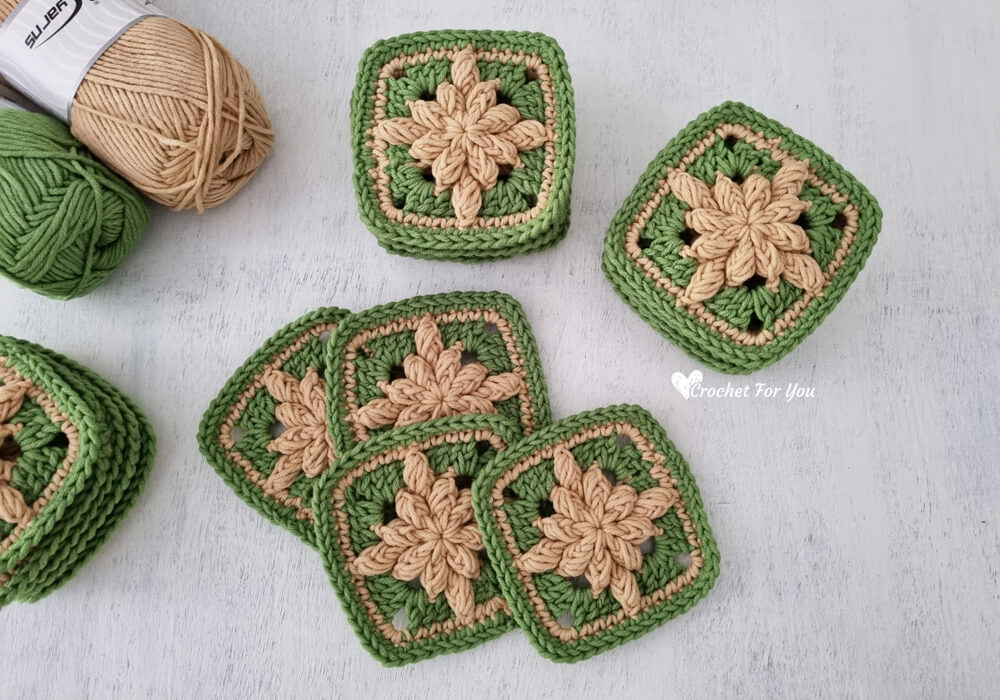
The granny square bag is stylish and new trend now. There are many ways to make a granny square bag. I made assembling 24 squares together.
This bag with bobble drops flower granny square is an interesting and stylish rather than making a basic granny square bag.
Skill Level: Intermediate
Finished sizes:
– Granny square: 4.5″ x 4.5″
– Bag: 17″ wide and 13.5″ tall (from the top point to the bottom of the bag)
Materials:
4-Medium / Worsted / Cotton blend / Approx: 700 yards
- (I used) Ice Yarn Lorena Worsted in 2 colors. 2 skeins of Cafe Latte, 2 skeins of Green
- US H-8 / 5mm crochet hook (for bag) US J-10 / 6mm crochet hook (for straps)
- Tapestry needle for weaving ends
- Scissors
Gauge: 15 sc x 15 rows = (4” x 4”) with H-8, 5mm crochet hook.
Abbreviations / special stitches
- ch = chain
- sl st = slip stitch
- sc = single crochet
- dc = double crochet
- st = stitch
- ch-sp = chain- (number of chains) space
- beg = beginning
- *to ; = repeat * to the instructions.
- C1 = color 1
- C2 = color 2
Special stitches:
- fpbobble = yarn over, insert the hook from front to back to front again around the post of next st, yarn over, pull back loop through the st, [yarn over, insert the hook from front to back to front again around the post of the same st, yarn over, pull back loop through the st] 2 times, yarn over, pull back through 6 loops on the hook, yarn over, pull back through 2 loops on the hook.
- Notes:
- To start a granny square bag you will need to make 24 granny squares first.
- For making this bag the Bobble Drops Flower Granny Square pattern is used which is previously released on Crochet For You Blog. The square pattern has adjusted with one more sc round to make it more suitable for this bag.
- When you make these squares for the bag, you have to change the color 4 times to make one square. Since the bag has wrong side and it is always on the inside I have carried the yarn on the wrong side when it needs.
- You can make this bag in solid color too. Try bobble drops flower granny square in solid color (click here for the pattern), but remember to add one more sc round. After you follow the solid square pattern come here and follow the final round (round 5 on this post) and finish the squares.
- You can find the bobble drops flower granny square video tutorial here, but remember there are 4 rounds only in the original square pattern, so you need to follow the final round (round 5 on this post) and finish the squares.
- Once the 24 squares finished, they are joined using slip stitch seam. And one sc round around the bag opening edge.
- The Romanian cord is used as bag handles, it is crocheted separately and attached to the bag lastly. As an option, you can use leather handles, too.
- I followed the Make And Do Crew video tutorial to make Romanian cord.
Video Tutorial
The original pattern in this video tutorial needs to adjust with one more sc round to make it more suitable for this bag. After following this video tutorial, you need to come here back to follow the final round (round 5 on this post) to finish the square.
Click here for the Left Handed video tutorial
Bobble Flower Granny Square Bag Pattern
Crochet Bobble Drops Flower Granny Square Pattern (make 24)
With (C1) make a magic ring.
Round 1: ch 1 (in this round beg ch does not count as st) 12 dc into the ring, sl st to the first st. (12 dc)
Round 2: with (C1), ch 1 (in this round beg ch does not count as st), fpbobble in first st, [3 dc in next st, fpbobble in next st, ch 3, fpbobble in next st] 3 times, 3 dc in next st, fpbobble in next st, ch 3, sl st to the first. (8 fpbobbles/12 dc)
Round 3: join (C2) yarn, ch 3 (in this round ch 3 count as a dc), dc in next st, ch 1, sk next st, dc in each of next 2 st, *(2 dc, ch 3, 2 dc) in ch-3 sp, dc in each of next 2 st, ch 1, sk next st, dc in each of next 2 st; repeat * to around, after crocheting last dc, sl st to the beg ch 3 top. (32 dc)
(In this round all fpbobble working over the chain 1 and around the post of skipped st one row below)
Round 4: join (C1) yarn, ch 1 (does not count as st) sc in first st and next st, fpbobble st in next st one row below, sc in each of next 4 st, 3 sc in ch-sp, *sc in each of next 4 st, fpbobble in next st one row below, sc in each of next 4 st, 3 sc in ch-3 space; repeat * to around, after crocheting last sc, sl st to the first st. (4 fpbobbles/44 sc)
Round 5: with (C1), ch 1, crochet sc around the square, make sure to crochet 3 sc in each corner st (middle st in 3 sc at the corner), sl st to the first st. Fasten off, weave the ends.
Joining granny squares
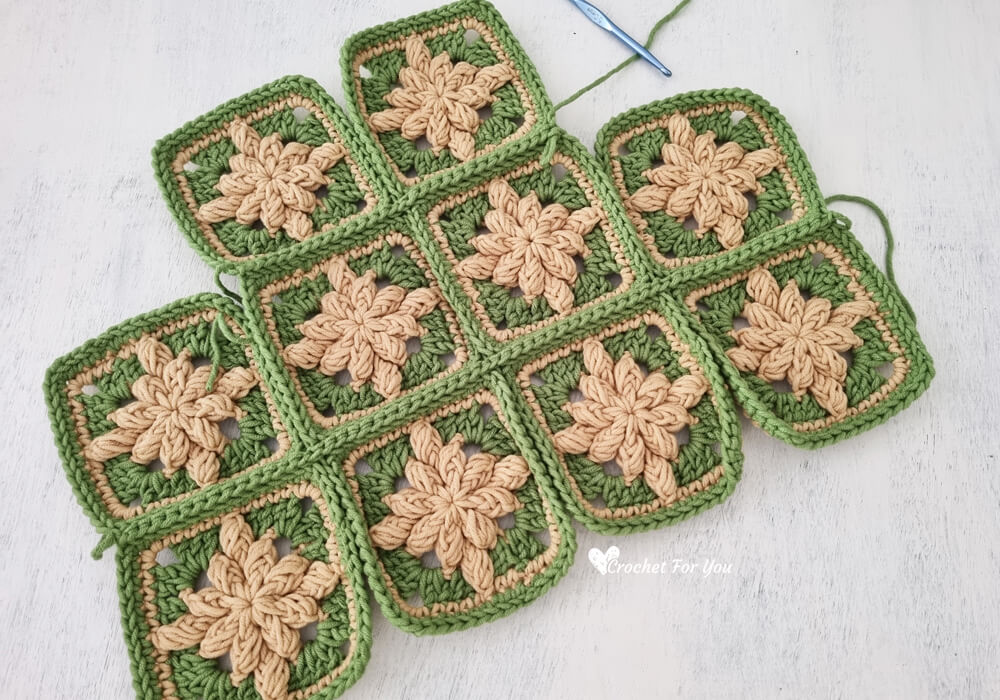
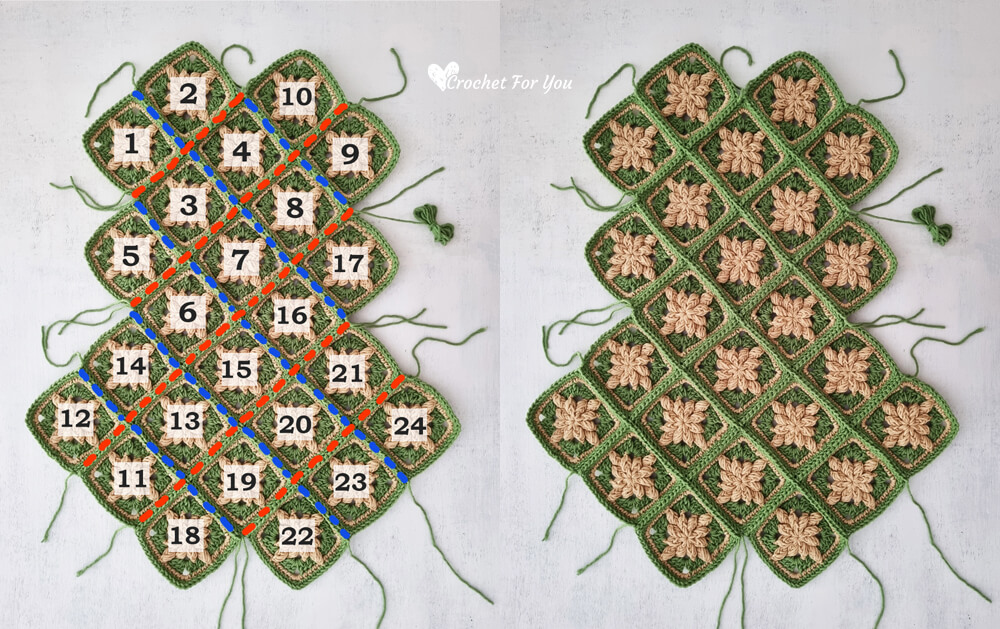
Arrange the 24 squares as shown in the diagram below. Start to joining squares together using slip stitches.
In the first image shown the numbers in order how I joined squares (please remember I’m a lefty so the numbers in order may confuse if you are a right handed crocheter). After finishing joining in red dotted lines in diagonal ways, start joining opposite diagonal (blue dotted lines) and complete the joining.
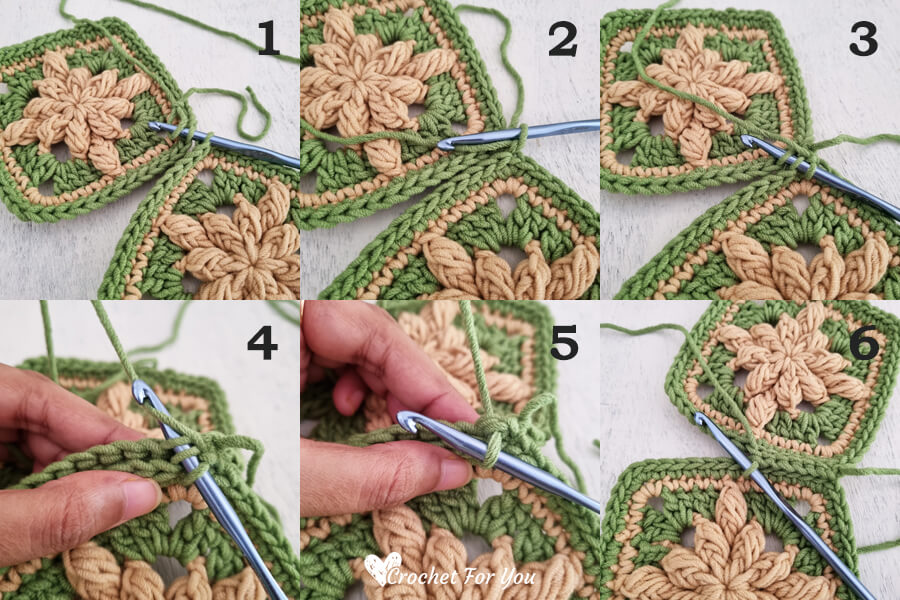
How to crochet the slip stitch seam
Get the two squares facing right side up. Insert the hook into the back loop of each square (image 1). Draw up a loop through (image 2), *insert the hook into the back loop of each square (image 3), yarn over (image 4), pull back through the stitch and the loop on the hook (image 5); Repeat * this method to attach all square together.
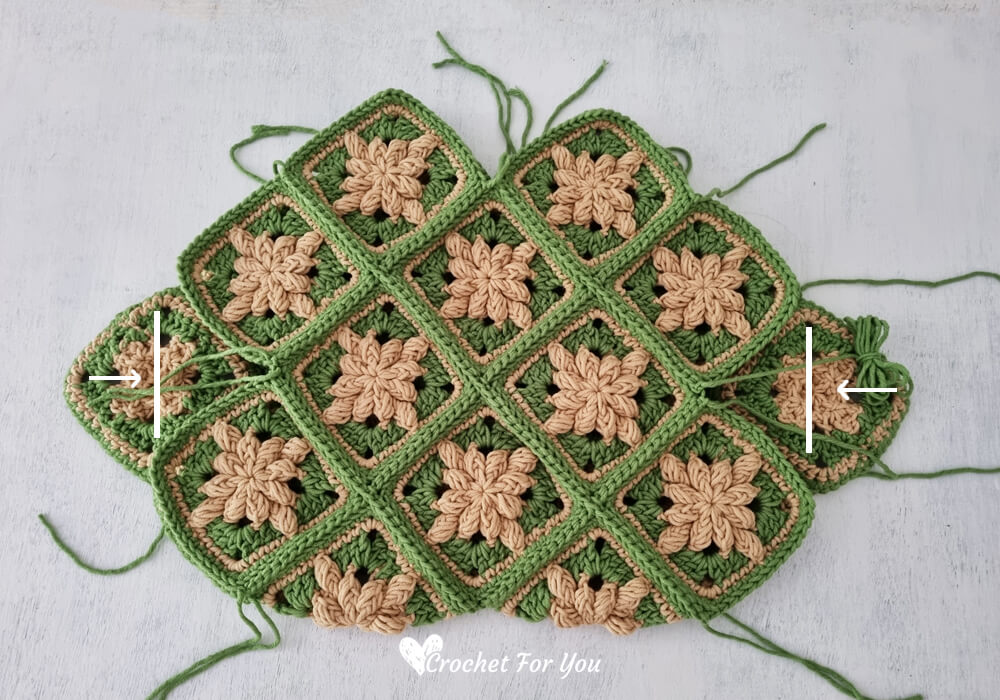
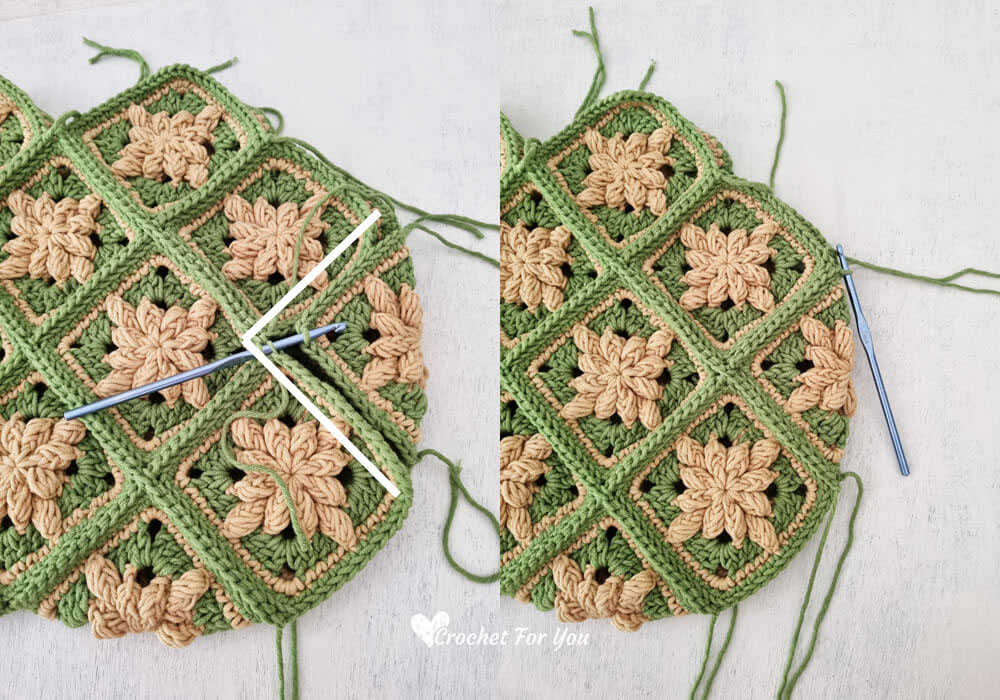
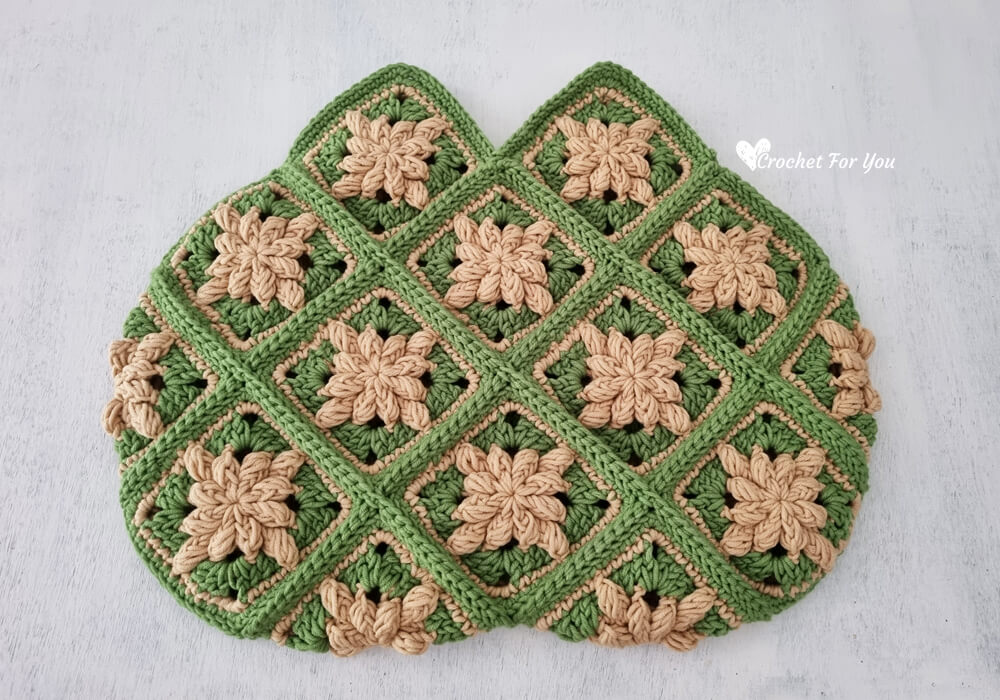
After joining all the squares, fold the piece in half shown in the image above (right side out). Fold the side granny square and attach them (image below), too. Finally, weave the all ends.
Edging
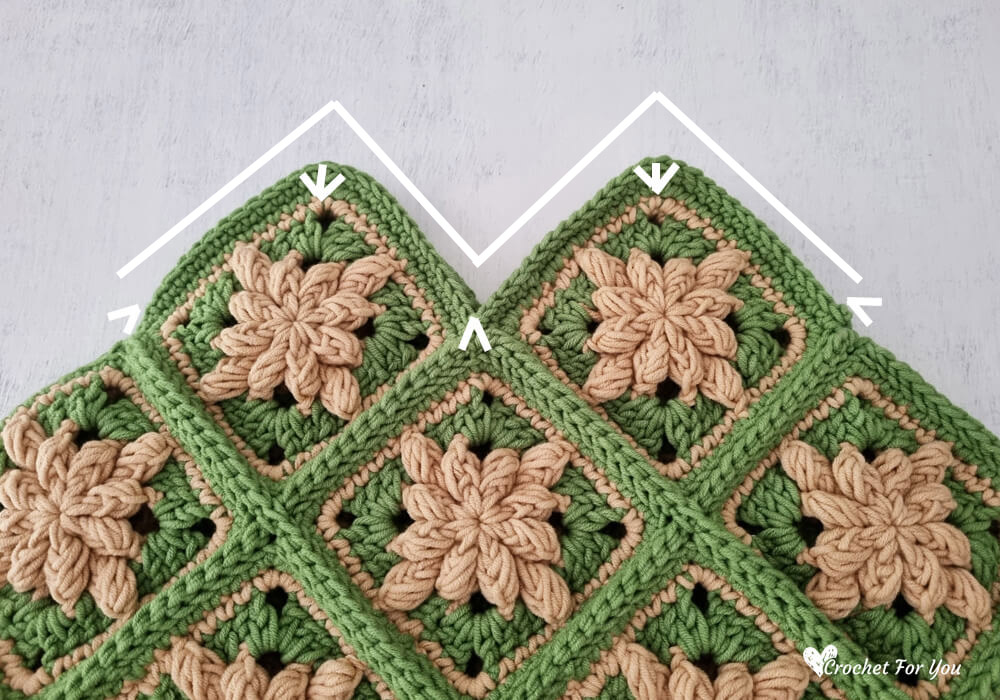
With (C2) yarn start to crochet around the edge, There are 4 top points and 4 lower points at the opening. I started from one of the sides of the bag and join the yarn at the lower point. Crochet sc evenly around the opening. Make sure to crochet sc2tog at the lower points (see image below) and 3 sc in the top point (the middle st of the 3 st). Once you crocheted the last sc, sl st to the first st. Cut the yarn and weave the end.
Crochet handles
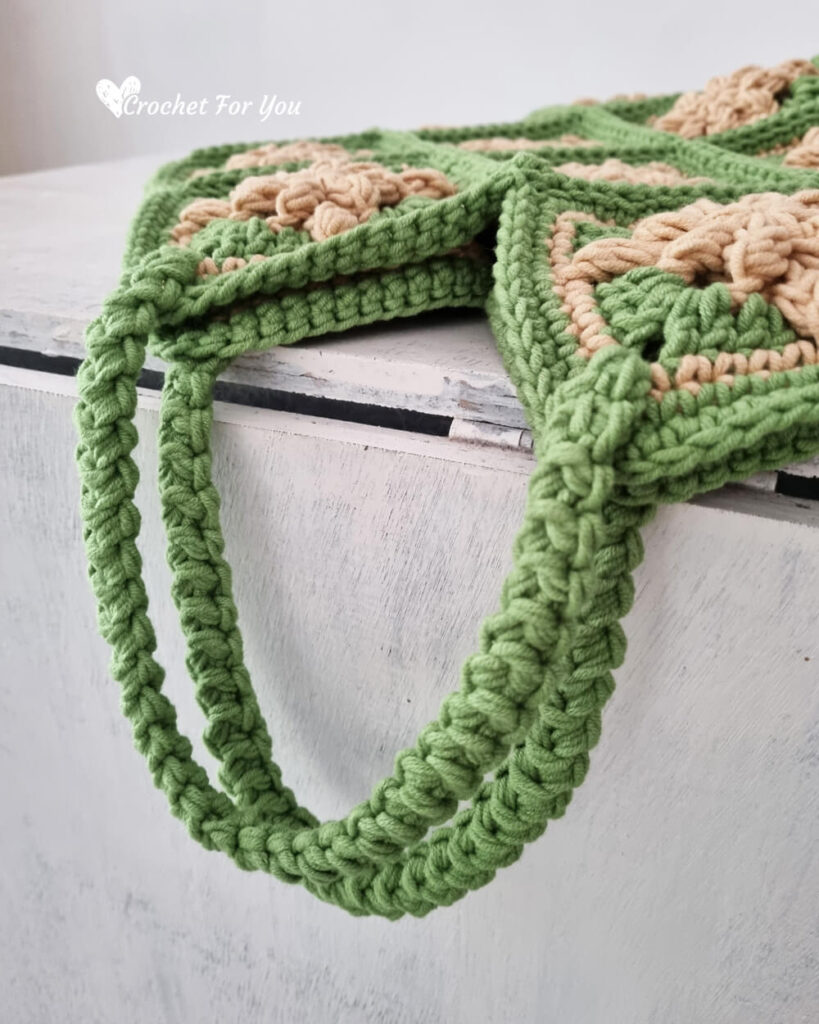
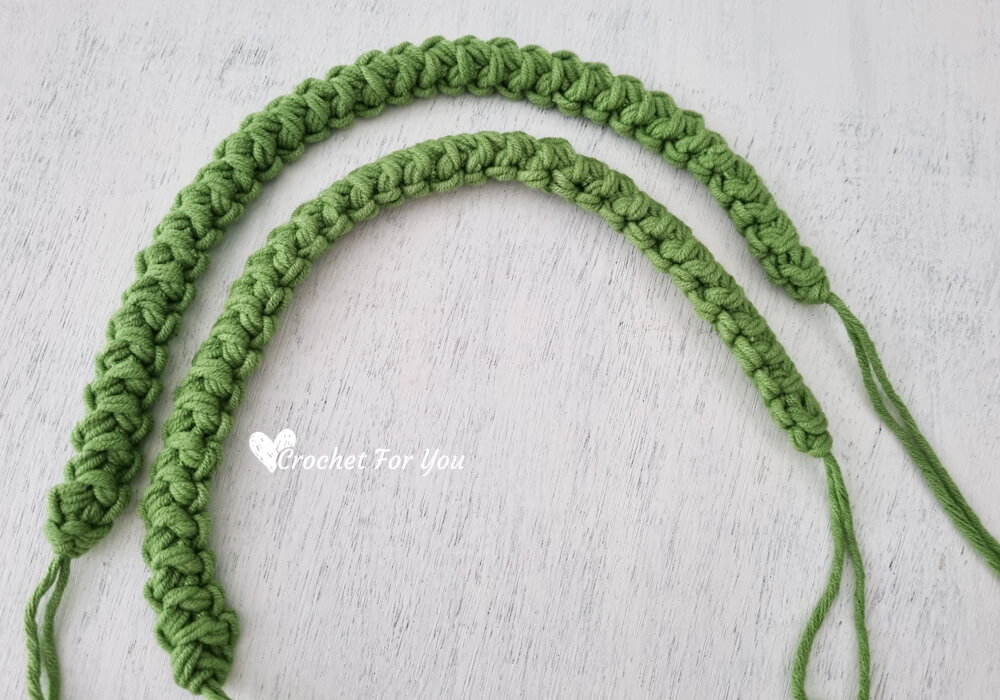
Because I just wanted to try new things in crochet, I crocheted Romanian cord and attached to the bag lastly. You know how stretchy is single crochet handles when the bag is full. But the Romanian cord is strong and sturdy than regular chain handles.
I followed the Jess Coppom’s video tutorial from makeanddocrew.com. The video tutorial was very helpful and clear to me to understand how to crochet Romanian Cord (Click here for the video tutorial).
When crocheting Romanian cord for the bobble flower granny square bag
- I held two strands together make it stronger and used a larger hook US J-10 / 6mm crochet hook.
- Remember to work stitches loosely.
- It was hard to count the stitches on the cord so I pay attention to the length of the strap while crocheting.
- I made 12.5″ long straps for my bag, you can make it shorter or longer if you want.
- When starting and finishing the strap, remember to leave 8″ or 10″ yarn tail to sew the handles.
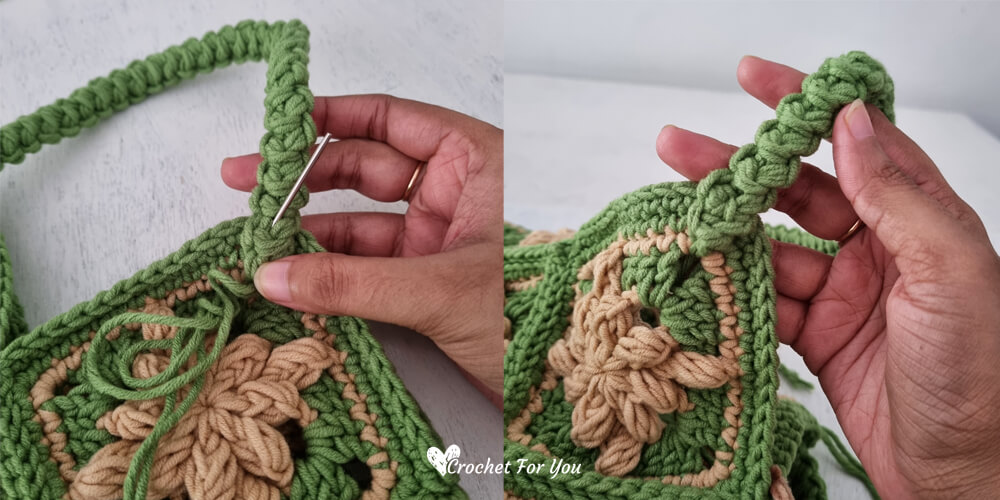
- Finally, sew handles to the bag using yarn tails of the handles
Hope to see you soon with a new FREE pattern
Until then, Happy Crocheting!!
Share your finished projects of this pattern on Crochet For You FB page.
Happy hooking with Crochet For You!!
Let’s connect and share
Facebook| Pinterest | Twitter | Instagram
All contents include photography and patterns are copyrighted Crochet For You by Erangi Udeshika.
Do not copy, edit, distribute or republish patterns and images in this blog in part or whole as your own. Please, share a direct link to the pattern with others and anywhere else. You are welcome to make and sell finished items using my patterns.
Visit Copyright / Terms of use for more info. Thank you.
