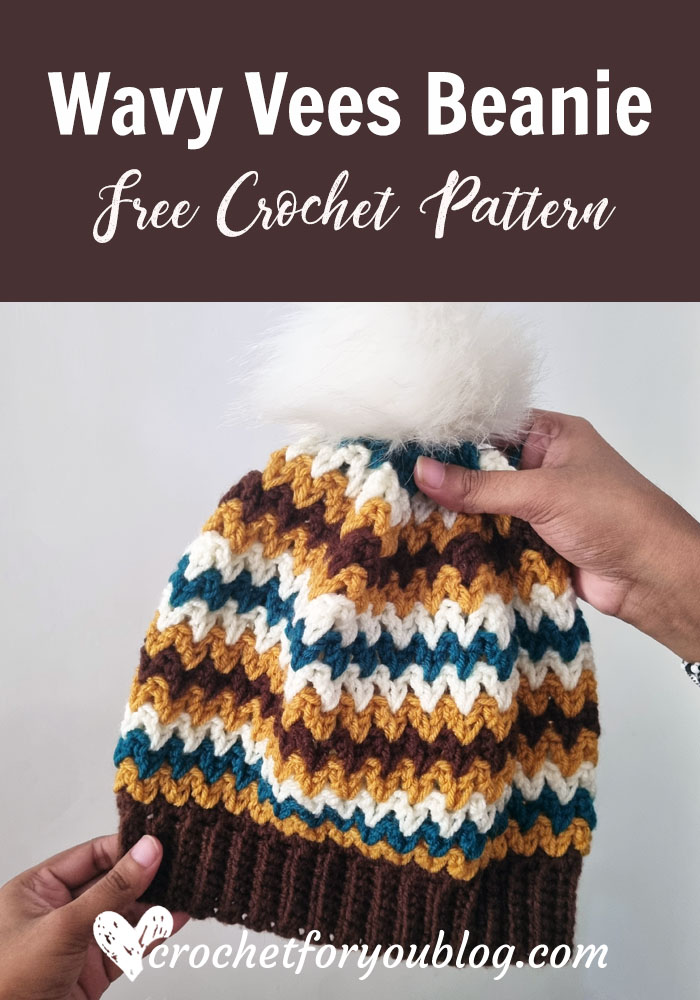
Wavy Vees Crochet Beanie Free Pattern
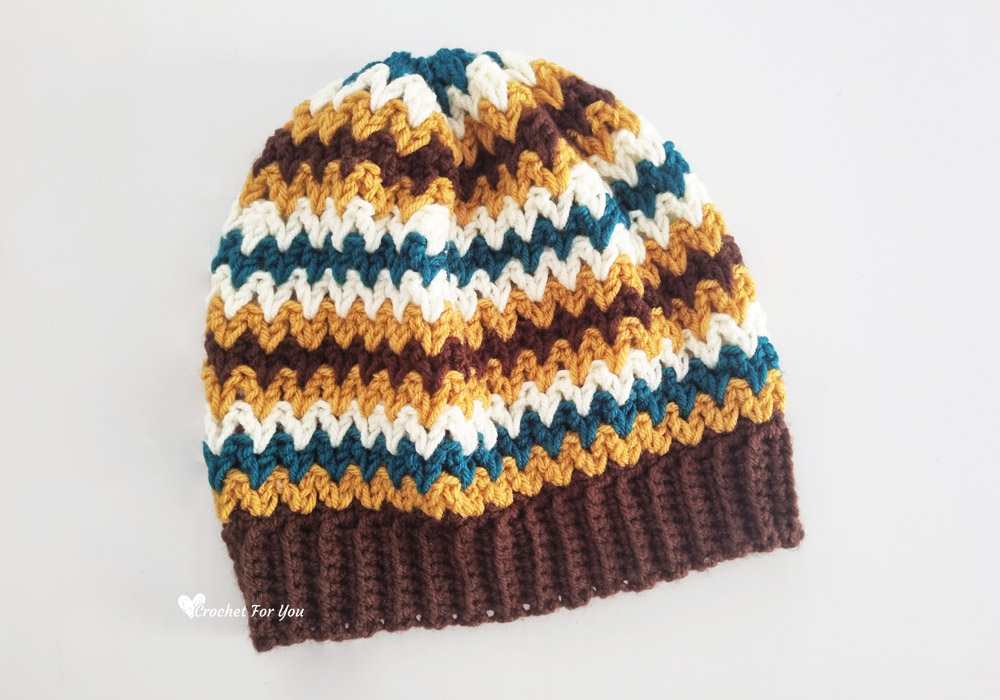
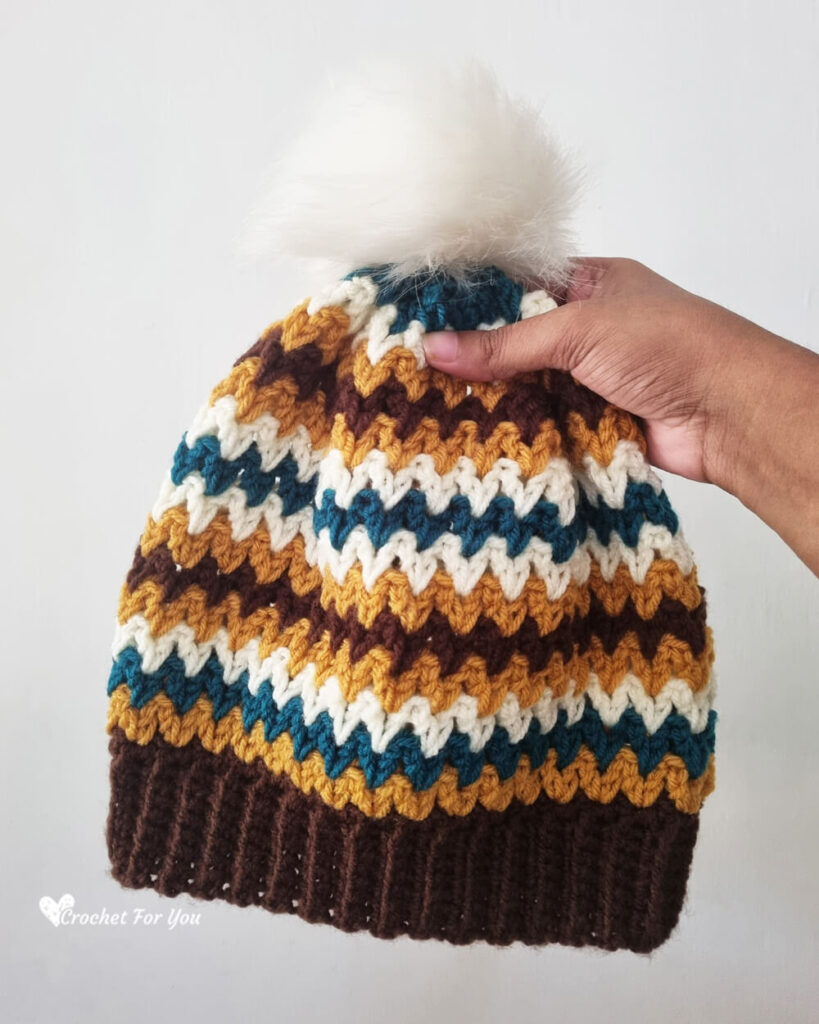
The Wavy Vees Beanie is a beginner-friendly crochet pattern that you can make for this Fall season. This crochet beanie is so simple to work with beautiful crochet V stitches. You have more freedom to play with colors and create a cozy and stylish beanie using leftover yarns from previous crochet projects.
Add this pattern to Ravelry queue
Save on Pinterest
More colors, more beautiful!
Depending on your color choice, this beanie works beautifully with more colors. Add more colors to make it seasonal or go with your outfit. It’s a perfect scrap yarn project and a great mindless crochet pattern to try.
This crochet beanie pattern available in Teen/Adult size, but can be adjusted to any size, see the note section.
Try these cozy beanies for Fall
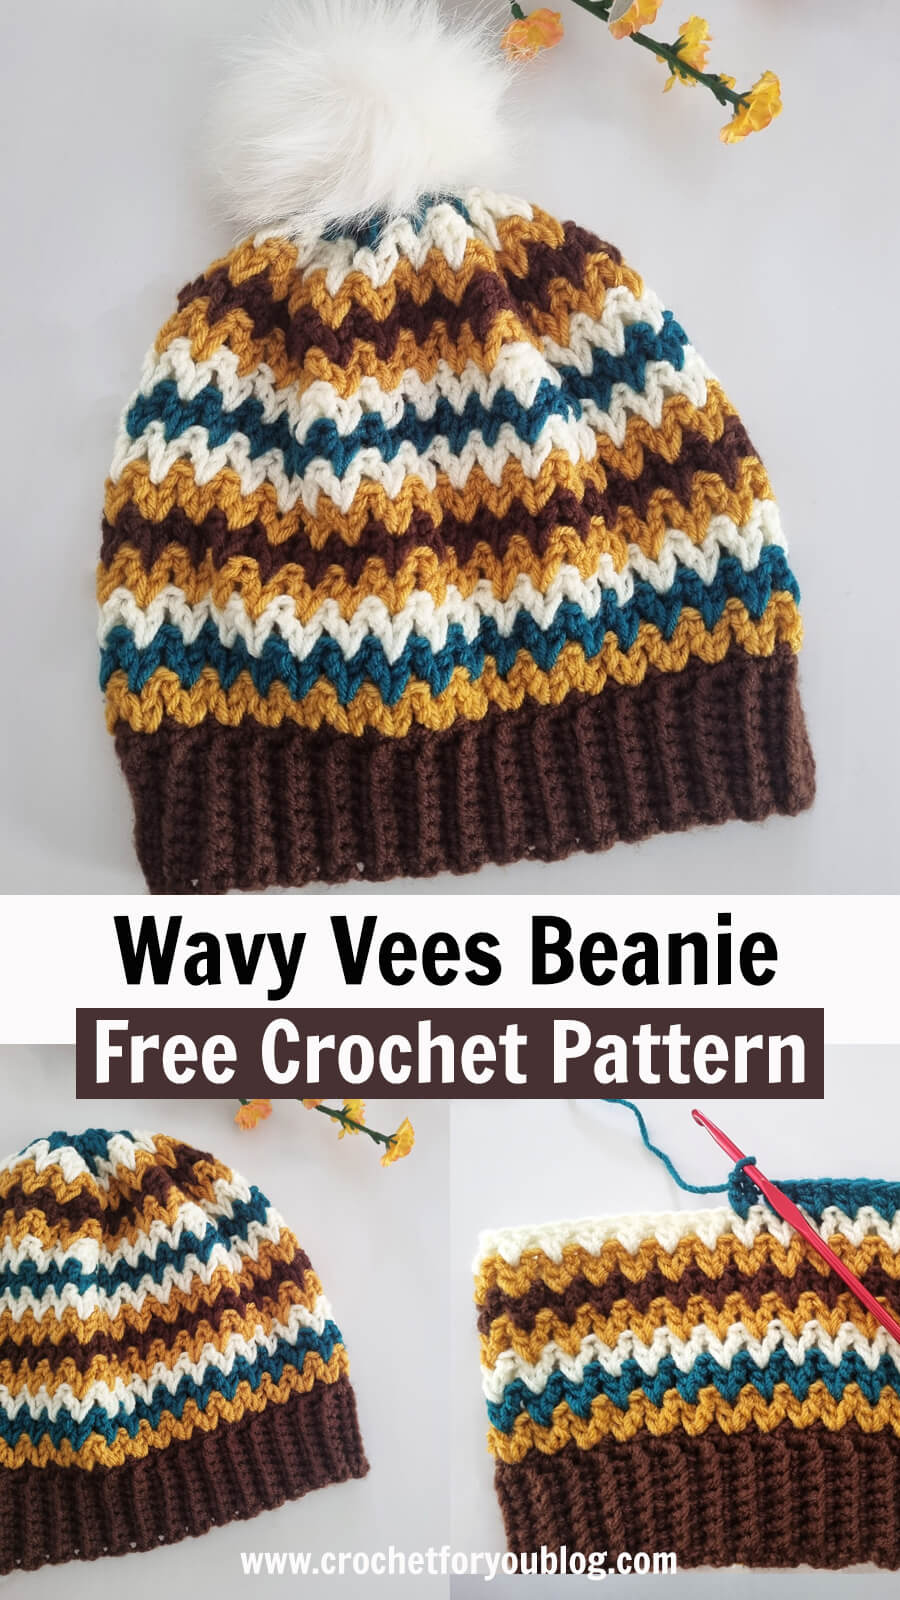
Wavy Vees Crochet Beanie Pattern
Skill Level: Easy
Finished size: Teen/Adult: Circumference 19 – 20″ Hat height 9″ without pompom
Materials: 4-Medium / Worsted / 100% Acrylic / Approx: 200 yards total
(I used)
– Ice Yarn Favorite (100% Acrylic; 229 yards [210 meters] / 100g) Brown (C1), Gold (C2), Sea Green (C3), Lemon Yellow (C4)
– US I/9, 5.5mm crochet hook
– US H/8, 5mm crochet hook
– Tapestry needle for weaving ends.
Gauge: 14 hdc x 10 rows = 4″ with US I-9 (5.5mm) crochet hook
Abbreviations / special stitches (US Term)
- ch – chain
- sl st – slip stitch
- sc – single crochet
- dc – double crochet
- sk – skip
- st(s) – stitch(s)
- BL – back loop
- *to – repeat * to the instructions.
- beg – beginning
- (RS) – Right Side
- (C1) – Color 1
- (C2) – Color 2
- (C3) – Color 3
- (C4) – Color 4
Special stitches
- 2dc cluster – yarn over, insert the hook in indicated space between 2dc, yarn over, pull up a loop, yarn over, pull back through two loops on the hook, yarn over, insert the hook in same space, yarn over, pull up a loop, yarn over, pull back through two loops on the hook, yarn over, pull through the three loops on the hook.
Notes
- This beanie work in bottom up.
- The beanie can be adjusted to any size. Crochet multiple of 2 rows for the band part to get your desired circumference.
Ribbed band
With (C1), Leaving about 6” long yarn tail, crochet ch 9 with US H-8 /5mm crochet hook.
Row 1: sc in 2nd ch from the hook, sc in each st across, turn. (8 sts)
Row 2: ch 1, sc in first st, sc in BL of each of next 6 st, sc in last st, turn. (8 sts)
Row 3 to 68: repeat row 2.
Do not cut the yarn start to work on the long side of the band.
(Insert the yarn tail through the tapestry needle, place two short sides together and sew with the tapestry needle)
Body of the hat (Work on the long side of the band)
(RS) with US I-9,5.5mm crochet hook
Round 1: with (C1) ch 1, sc in first st and each st around, join with sl st in first st. (68 sts total)
Round 2: join (C2) yarn in first st, ch 3 (count as dc), dc in first st, *sk next st, 2 dc in next; repeat * from around, join with sl st in beg ch 3 top. (34 (2dc) total)
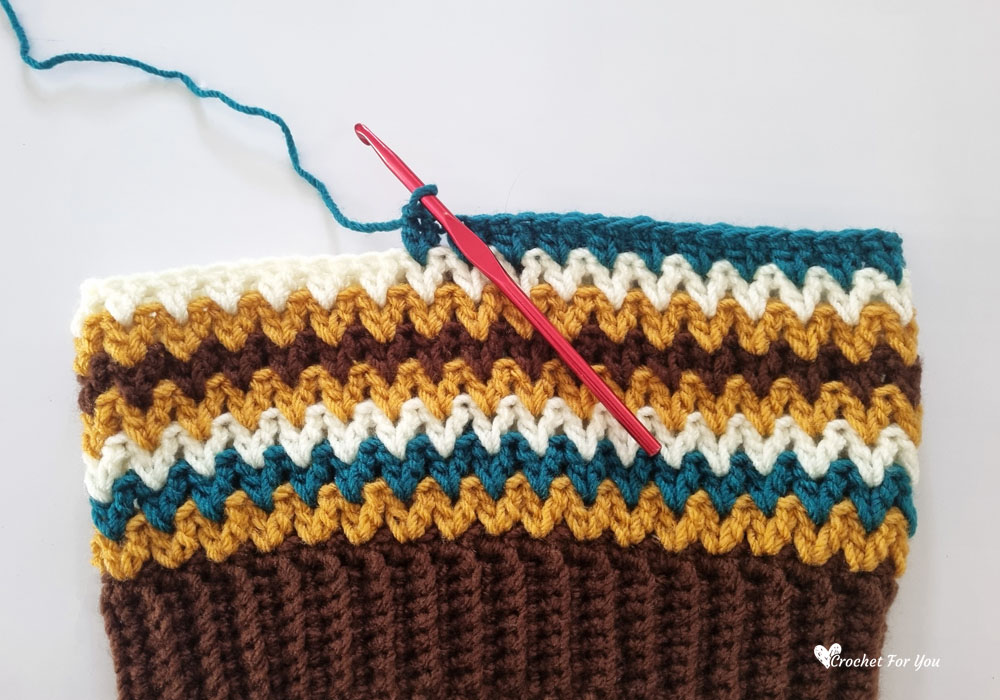
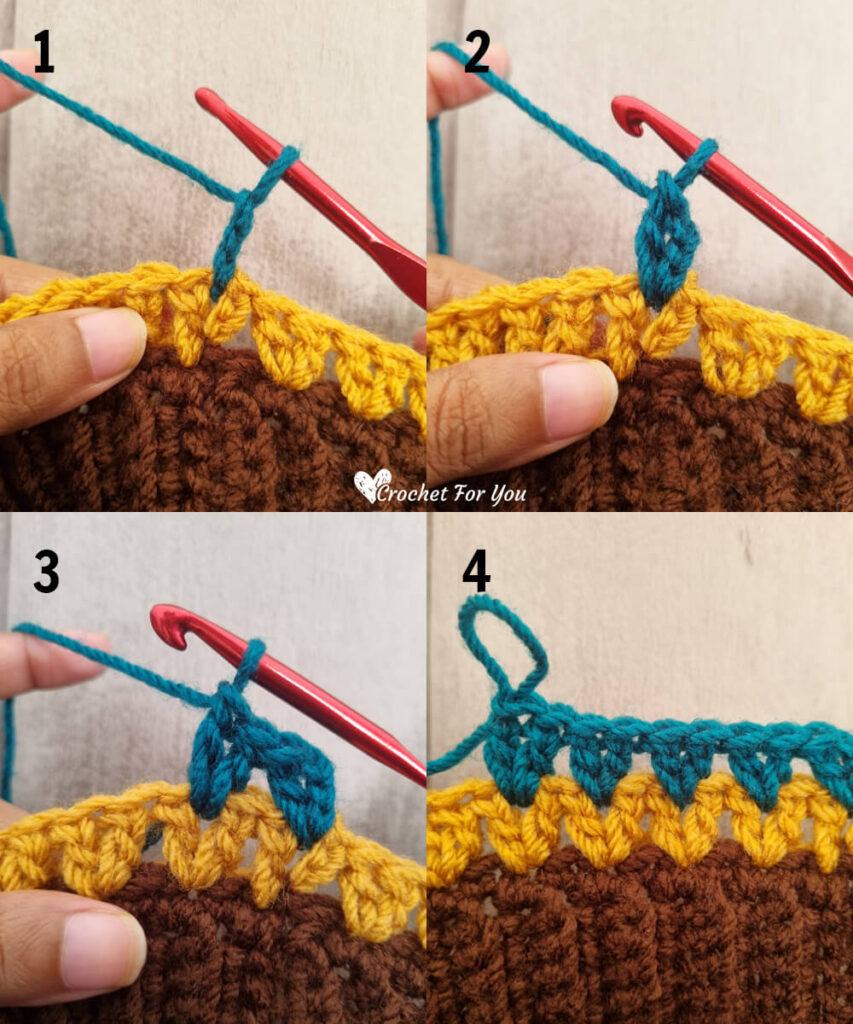
Round 3: join (C3) yarn in space between 2 dc, ch 3 (count as dc) (image 1), dc in same space (image 2), *2 dc in next space between 2 dc; repeat * from around (image 3 & 4), join with sl st in beg ch 3 top. (34 (2dc) total)
(See step by step photos below)
Round 4: repeat round 3 with (C4). (34 (2dc) total)
Round 5: repeat round 3 with (C2). (34 (2dc) total)
Round 6: repeat round 3 with (C1). (34 (2dc) total)
Round 7: repeat round 3 with (C2). (34 (2dc) total)
Round 8: repeat round 3 with (C4). (34 (2dc) total)
Round 9: repeat round 3 with (C3). (34 (2dc) total)
Round 10: join (C4) yarn in space between 2 dc, ch 3 (count as dc), dc in same space, [2 dc in next space between 2 dc] 4 times, 2dc cluster in next space between 2 dc, *[2 dc in next space between 2 dc] 5 times, 2dc cluster in next space between 2 dc; repeat * from around, join with sl st in beg ch 3 top. (29 (2dc) total / 5 (2dc) cluster)
Round 11: join (C2) yarn in space between 2 dc, ch 3 (count as dc), dc in same space, [2 dc in next space between 2 dc] 4 times, sk next 2dc cluster, *[2 dc in next space between 2 dc] 5 times, sk next 2dc cluster; repeat * from around, join with sl st in beg ch 3 top. (29 (2dc) total)
Round 12: join (C1) yarn in space between 2 dc, ch 3 (count as dc), dc in same space, [2 dc in next space between 2 dc] 3 times, 2dc cluster in next space between 2 dc, *[2 dc in next space between 2 dc] 4 times, 2dc cluster in next space between 2 dc; repeat * from around, join with sl st in beg ch 3 top. (24 (2dc) total / 5 (2dc) cluster)
Round 13: join (C2) yarn in space between 2 dc, ch 3 (count as dc), dc in same space, [2 dc in next space between 2 dc] 3 times, sk next 2dc cluster, *[2 dc in next space between 2 dc] 4 times, sk next 2dc cluster; repeat * from around, join with sl st in beg ch 3 top. (24 (2dc) total)
Round 14: join (C4) yarn in space between 2 dc, ch 3 (count as dc), dc in same space, [2 dc in next space between 2 dc] 2 times, 2dc cluster in next space between 2 dc, *[2 dc in next space between 2 dc] 3 times, 2dc cluster in next space between 2 dc; repeat * from around, join with sl st in beg ch 3 top. (18 (2dc) total / 6 (2dc) cluster)
Round 15: join (C3) yarn in space between 2 dc, ch 3 (count as dc), dc in same space, [2 dc in next space between 2 dc] 2 times, sk next 2dc cluster, *[2 dc in next space between 2 dc] 3 times, sk next 2dc cluster; repeat * from around, join with sl st in beg ch 3 top. (18 (2dc) total)
Round 16: with (C3), sl st in space between 2 dc, sc in same st, *sc in next space between 2 dc; repeat * from around, join with sl st in first sc. (18 sc total)
Fasten off and cut the yarn leaving about 10” long yarn tail.
Finishing (Close top of the hat)
Insert the yarn tail through the tapestry needle and weave through spaces between stitches in the last round. Pull the yarn tightly and close the top of the hat with a few more stitches. Lastly, attach pom-pom.
Hope to see you soon with a new FREE pattern
Until then, Happy Crocheting!!
Share your finished projects of this pattern on Crochet For You FB page.
Happy hooking with Crochet For You!!
Let’s connect and share
Facebook | Pinterest | Twitter | Instagram
All contents include photography and patterns are copyrighted Crochet For You by Erangi Udeshika.
Do not copy, edit, distribute or republish patterns and images in this blog in part or whole as your own. Please, share a direct link to the pattern with others and anywhere else. You are welcome to make and sell finished items using my patterns.
Visit Copyright / Terms of use for more info.
Thank you.
