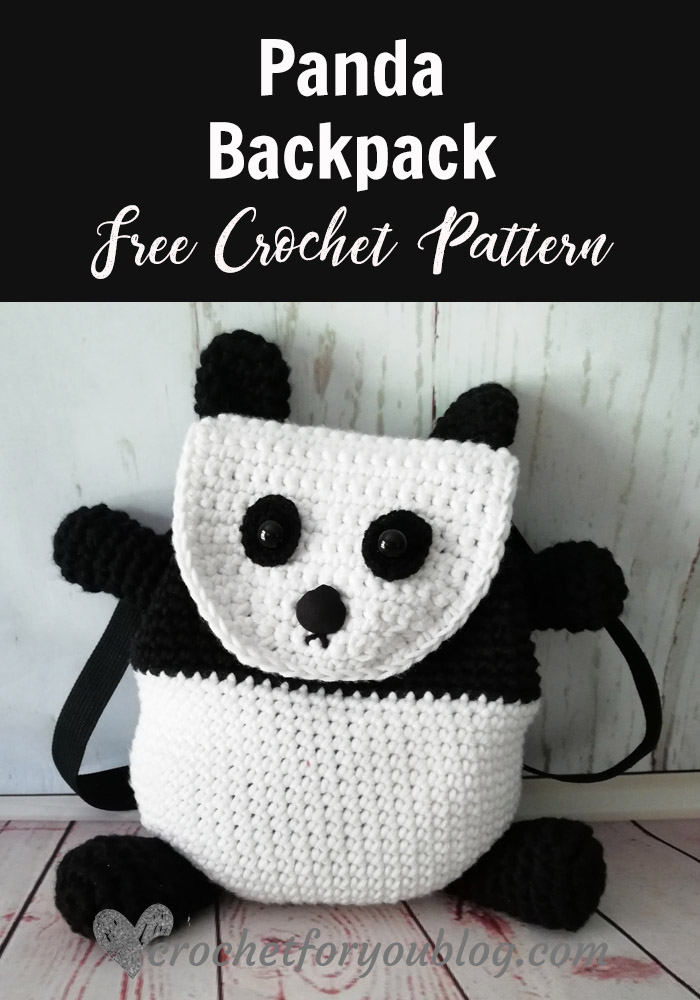
Crochet Panda Backpack Free Pattern
Crochet Panda Backpack Pattern by Crochet For You.
This summer I’m in love crocheting backpack! Since my first backpack, Bumble Bee Backpack Pattern is still very popular, I tried to make another backpack for kids. As you can see, the final result amazingly adorable! This time I made a cute looking panda backpack. 😀 It would be a great gift for kids as a holiday or birthday gift.
This panda backpack free pattern is a cute and little backpack for kids to keep their treasure. It has little hands and legs. Eyes, ears, and a button as a nose on the flap! It is so easy to crochet as a bumble bee backpack I made and shared last April. 😀 Click here if you didn’t see it yet.
Disclosure: This blog contains affiliate links.
Add this pattern to Ravelry queue
Save on Pinterest
Skill level easy
Finished size
- 9″ height without ears x 8.75″″ wide without hands and legs.
Materials
- #4-Medium / Worsted / Cotton / Approx: 175 yards
(I used)
- (C1) 1 skein of Soft Smooth Cotton Natural Double Knitting Wool Yarn Ball Baby Woolcraft 200g– white 75 yards
- (C2) 1 skein of Soft Smooth Cotton Natural Double Knitting Wool Yarn Ball Baby Woolcraft 200g– black 100 yards
- Small amount of sport or DK weight black yarn and 3mm crochet hook
- I-9, 5.5mm crochet hook
- 1 triangle shaped button for the nose.
- 2 safety eyes
- Stitch markers
- Fiberfill
- 20″ long cord for the drawstring / 50″ long strap (I used the straps on old school bag)
- Tapestry needle for weaving ends.
Gauge: 13 sc x 14 rows = 4″ with I-9, 5.5mm crochet hook
Abbreviations
- ch = chain
- sc = single crochet
- st = stitch
- sk = skip
- sl st = slip stitch
- ch-sp = chain space
- beg = beginning
- * to ; = repeat * to the instructions.
- [] = work instructions within brackets as many times as directed
- (RS) = right side
- (WS) = wrong sie
- (C1) = color 1
- (C2) = color 2
Special stitches
- sc2tog =[Insert hook in next st and draw up a loop] 2 times, yarn over, pull back through all 3 loops on hook at once.
Notes
- Beg ch does not count as st.
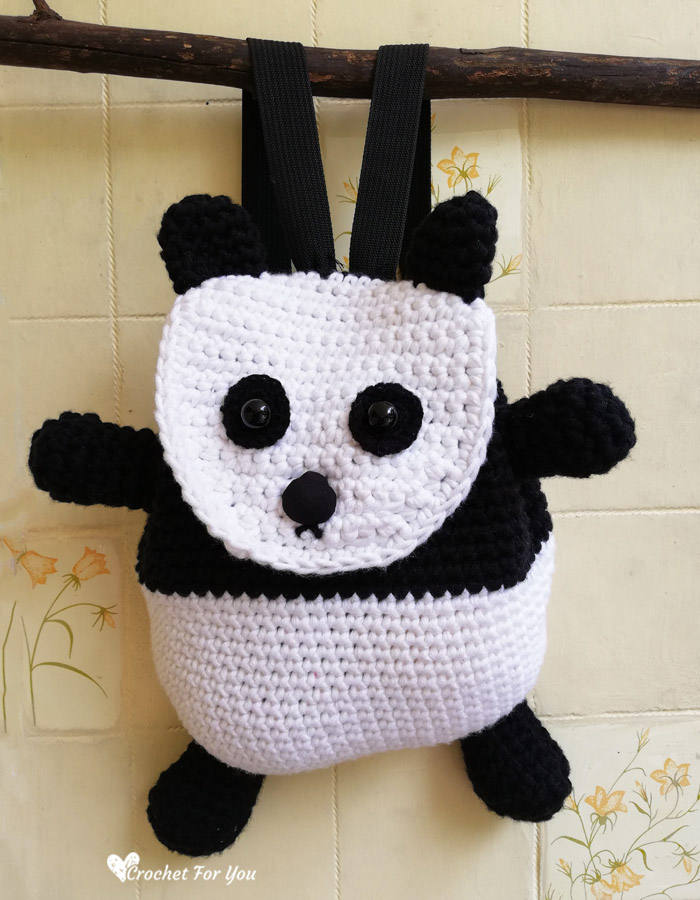
Crochet Panda Backpack Pattern
With (C1), ch 16,
Round 1: (RS) 3 sc in second ch from the hook, sc in each of next 13 st, 3 sc in last st, working on opposite side of the foundation chain. sc in each of next 13 st, sl st to the first st. (32 sts)
Round 2: ch 1, 2 sc in first st and each of next 2 sts, sc in each of next 13 sts, 2 sc in each of next 3 sts, sc in each of next 13 sts, sl st to the first st. (38 sts)
Round 3: ch 1, sc in first st, 2 sc in next st, [1 sc in next st, 2 sc in next st] 2 times, sc in each of next 13 sts, [1sc in next st, 2 sc in next st] 3 times, sc in each of next 13 sts, sl st to first st. (44 sts)
Round 4: ch 1, sc in first st and each of next 2 sts, 2 sc in next st, 1 sc in next st, 2 sc in next st, sc in each of next 19 sts, 2 sc in next st, 1 sc in next st, 2 sc in next st, sc in each of next 16 sts, sl st to the first st. (48 sts)
Round 5: ch 1, sc in first st and each st around, sl st to the first st. (48 sts)
Round 6: ch 1, sc in first st and next 3 sts, 2 sc in next st, 1 sc in next st, 2 sc in next st, sc in each of next 21 sts, 2 sc in next st, 1 sc in next st, 2 sc in next st, sc in each of next 17 sts, sl st to the first st. (52 sts)
Round 7: ch 1, sc in first st and each st around, sl st to the first st. (52 sts)
Round 8: ch 1, sc in first st and next 4 sts, 2 sc in next st, 1 sc in next st, 2 sc in next st, sc in each of next 23 sts, 2 sc in next st, 1 sc in next st, 2 sc in next st, sc in each of next 18 sts, sl st to the first st. (56 sts)
Round 9: ch 1, sc in first st and each st around, sl st to the first st. (56 sts)
Round 10: ch 1, sc in first st and next 5 sts, 2 sc in next st, 1 sc in next st, 2 sc in next st, sc in each of next 25 sts, 2 sc in next st, 1 sc in next st, 2 sc in next st, sc in each of next 19 sts, sl st to the first st. (60 sts)
Round 11: ch 1, sc in first st and each st around, sl st to the first st. (60 sts)
Round 12 to 20: repeat round 11.
Round 21 to 33: repeat round 11 with (C2)
Round 34: ch 1, sc in first st and next st, ch 2, sk next 2 sts, sc in each of next 4 sts, ch 2, sk next 2 sts, sc in each of next 8 sts, ch 2, sk next 2 sts, sc in each of next 4 sts, ch 2, sk next 2 sts, sc in each of next 6 sts, ch 2, sk next 2 sts, sc in each of next 4 sts, ch 2, sk next 2 sts, sc in each of next 8 sts, ch 2, sk next 2 sts, sc in each of next 4 sts, ch 2, sk next 2 sts, sc in each of next 4 sts. (8 ch-sp(s) / 44 sc total)
Round 35: ch 1, sc in each st across including chain spaces (crochet 2 sc in each ch-sp). (60 sts)
Round 36: ch 1, sc in first st and each st around, sl st to the first st. (60 sts) Attach stitch markers on the 8th st and 51st st.
Flap (Between marked stitches)
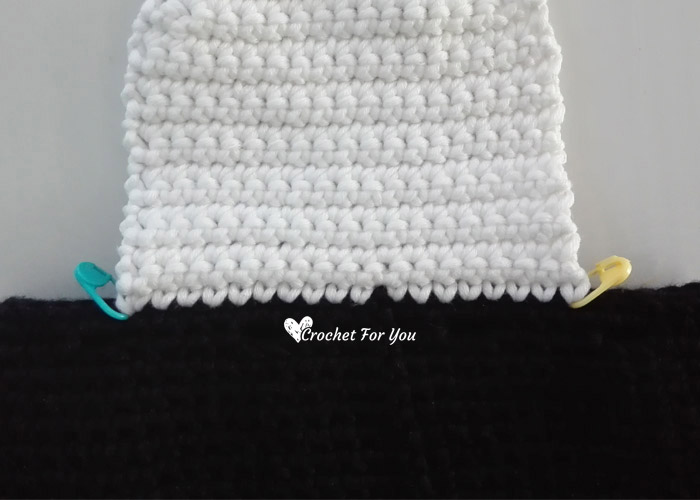
Row 1: with (C1), right side facing out, start at the one of marked st, ch 1, sc in first st and each 18 sts (the last st should be on the next marked st), turn. (18 sts)
Row 2: ch 1, sc in first st and each st across, turn. (18 sts)
Row 3 to 13: repeat row 2.
Row 14: ch 1, sc in first st, sc2tog, sc in each of next 12 sts, sc2tog, sc in last st, turn. (16 sts)
Row 15: ch 1, sc in first st and each st across, turn. (16 sts)
Row 16: ch 1, sc in first st, sc2tog, sc in each of next 5 sts, ch 3, sc in each of next 5 sts, sc2tog, sc in last st, turn. (14 sts)
Row 17: ch 1, sc in first st, sc2tog, sc in each of next 4 sts, sl st to ch-sp, sc in next 4 sts, sc2tog, sc in last st, turn. (12 sts)
Row 18: ch 1, sc in first st, sc2tog, sc in each of next 6 sts, sc2tog, sc in last st, turn. (10 sts)
Row 19: ch 1, sc in first st, sc2tog, sc in each of next 4 sts, sc2tog, sc in last st, turn. (8 sts)
Edging: Right side facing, start at row 1 of the flap. Crochet sc around the edge of the flap. 2 sc in random stitch on curve side to make a smooth edge. Fasten off weave the end.
Ears (make 2)
With (C2) make a magic ring.
Round 1: ch 1 (does not count as st), 5 sc into the ring, sl st to the first st. (5 sts)
Round 2: ch 1 (does not count as st), 2 sc in each st around, sl st to the first st. (10 sts)
Round 3: ch 1 (does not count as st), sc in each st around, sl st to the first st. (10 sts)
Rounds 4 and 5: repeat round 3. Leaving 10 – 12” long yarn tail cut the yarn and fasten off.
Arms (make 2)
With (C2) make a magic ring.
Round 1: ch 1 (does not count as st), 6 sc into the ring, sl st to the first st. (6 sts)
Round 2: ch 1 (does not count as st), 2 sc in each st around, sl st to the first st. (12 sts)
Round 3: ch 1 (does not count as st), sc in each st around, sl st to the first st. (12 sts)
Rounds 4 to 10: repeat round 3. Leaving 10 – 12” long yarn tail cut the yarn and fasten off.
Legs (make 2)
With (C2) make a magic ring.
Round 1: ch 1 (does not count as st), 6 sc into the ring, sl st to the first st. (6 sts)
Round 2: ch 1 (does not count as st), 2 sc in each st around, sl st to the first st. (12 sts)
Round 3: ch 1 (does not count as st), sc in first st, *2 sc in next st, 1 sc in next st; repeat * to around, sl st to the first st. (18 sts)
Round 4: ch 1 (does not count as st), sc in first 2 sts, *sc2tog, sc in next 2 sts; repeat * to around, sl st to the first st. (14 sts)
Round 5: ch 1, sc in each st around, sl st to the first st. (14 sts)
Round 6: ch 1 (does not count as st), sc in first 2 sts, *sc2tog, sc in next 2 sts; repeat * to around, sl st to the first st. (11 sts)
Round 7: ch 1 (does not count as st), sc in each st around, sl st to the first st. (11 sts)
Round 8 to 9: repeat round 7. Leaving 10 – 12” long yarn tail cut the yarn and fasten off.
Eyepatch (make 2)
With sport or DK weight black yarn and 3mm crochet hook, crochet ch 3,
Round 1: 3 sc in 2nd ch from the hook, 3 sc in last st, sl st to the first st. (6 sts)
Round 2: ch 1, 2 sc in first st, 2 sc in each st around, sl st to the first st. (12 sts)
Round 3: ch 1, 2 sc in first st, *sc in next st, 2 sc in next st; repeat * to around, sl st to the first st. Fasten off and weave the end. (18 sts)
Assembly
RS facing, place eye patches between rows 9 and 14 on the flap and sew. Attach safety eyes to the eye patches.
And stitch mouth below the buttonhole.
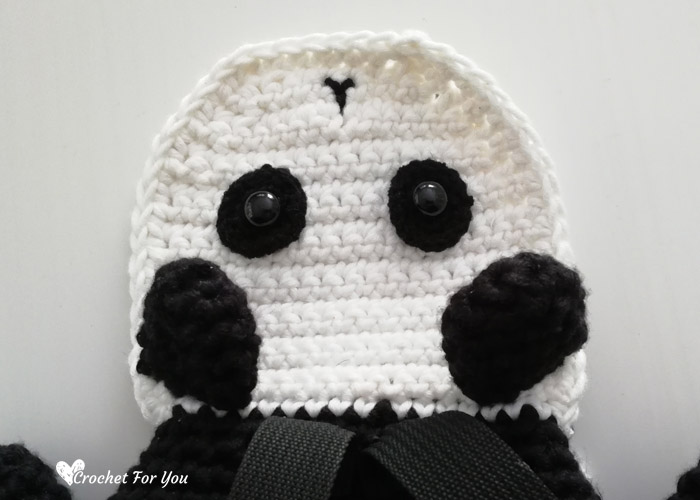
Ears: insert the yarn tail through the needle and sew each ear on two sides of the first row of the flap and angled a little bit. (See the photo above)
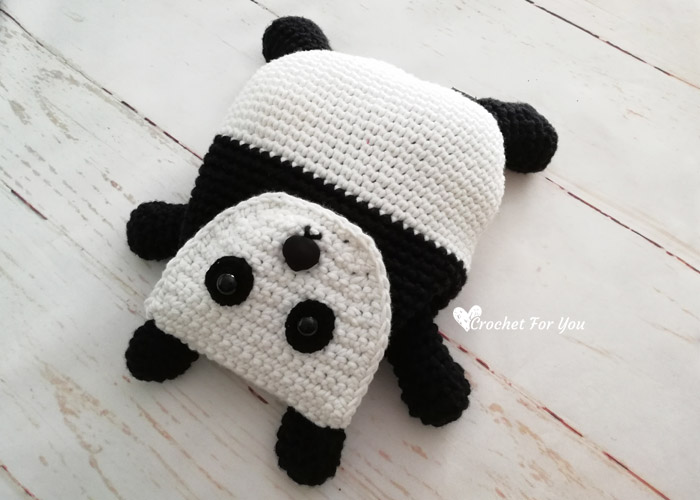
Arms: Add fiberfill first, insert the yarn tail through the needle and sew each arm on two sides of the bag (5 rounds below from the top of the bag). (See the photo below)
Legs: Add fiberfill first, insert the yarn tail through the needle and sew each leg on two sides of the first round of the bag. (See the photo below)
Please note that those eyepatches on the image below were not used to my finished backpack. Because it’s looked so big and chunky with worsted weight yarns, I made another 2 eyepatches later with sport weight yarns and used them to make a final finished project.
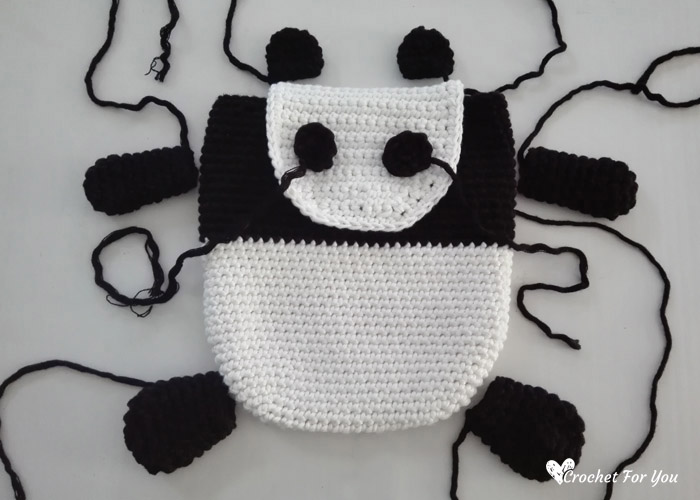
Drawstring: Cut a 20″ long cord and weave in and out of Round 34 every chain spaces.
Sew triangle shape button between rows 25 and 26 in the middle of the front side of the bag.
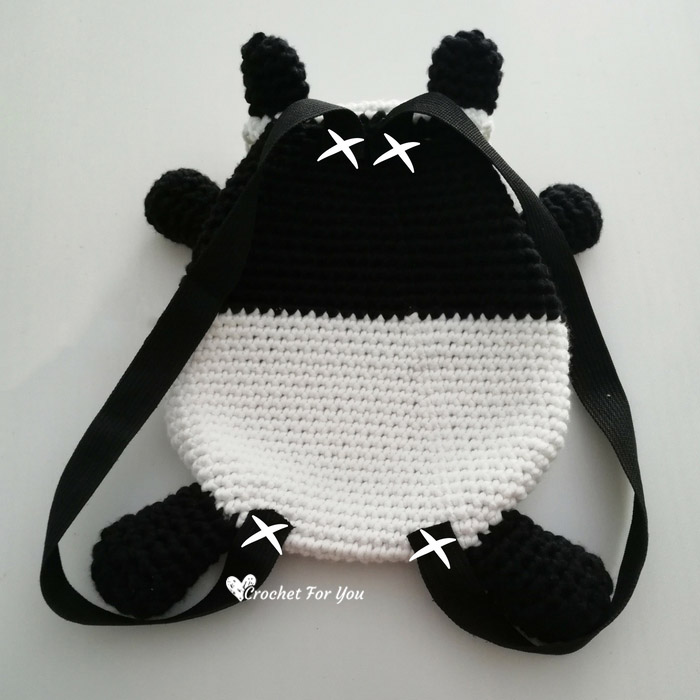
Shoulder straps: Cut 19″ long 2 handles and sew well onto the back of the bag. Be sure not to twist the handles. I used two handles from old school bag. (see the photo below). That’s all. 🙂
Hope to see you soon with a new FREE pattern
Until then, Happy Crocheting!!
Share your finished projects of this pattern on Crochet For You FB page.
Happy hooking with Crochet For You!!
Let’s connect and share
Facebook | Pinterest | Twitter | Instagram
All contents include photography and patterns are copyrighted Crochet For You by Erangi Udeshika.
Do not copy, edit, distribute or republish patterns and images in this blog in part or whole as your own. Please, share a direct link to the pattern with others and anywhere else. You are welcome to make and sell finished items using my patterns.
Visit Copyright / Terms of use for more info. Thank you.
7 Comments
Caitie
So sweet! My toddler would love this 🙂
Erangi Udeshika
Thank you. 🙂
Karen
Thank you! This would be a darling pajama bag, too!
Stephanie Caselli
Very cute. I want to make one for my great granddaughter
Karen Bowles
I’m trying to figure out what/how to figure out the eye patch part of your panda backpack pattern. I have 2 questions:
1. What is the mc part of row 1 for.
2. I don’t understand how you go from 12 to 36 by doing 2,1,2,1,2,1,2,1,2,1,2,1,this equals 18 not 36
Erangi Udeshika
Hi Karen, Yes! you’re right. It was an error. I fixed it and updated the pattern. 🙂 Thank you so much for letting me know about it.
Bonnie
Hi , very cute pattern, but you gave the color wrong on round 1 of the flap it should be c1 white and also on all the rest after should be c1 and you have it as c2