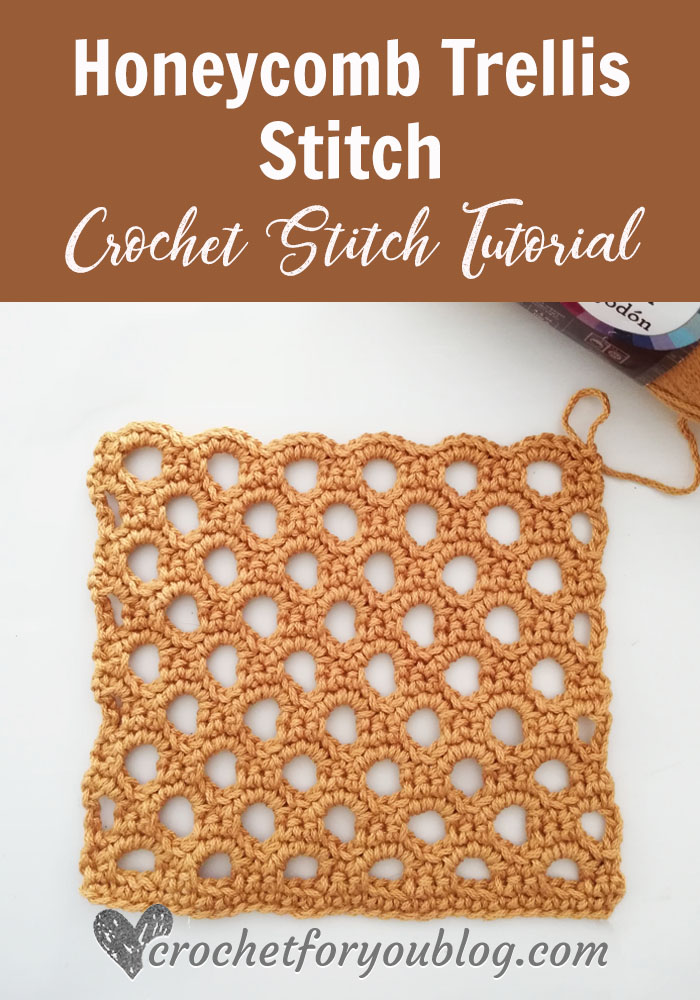
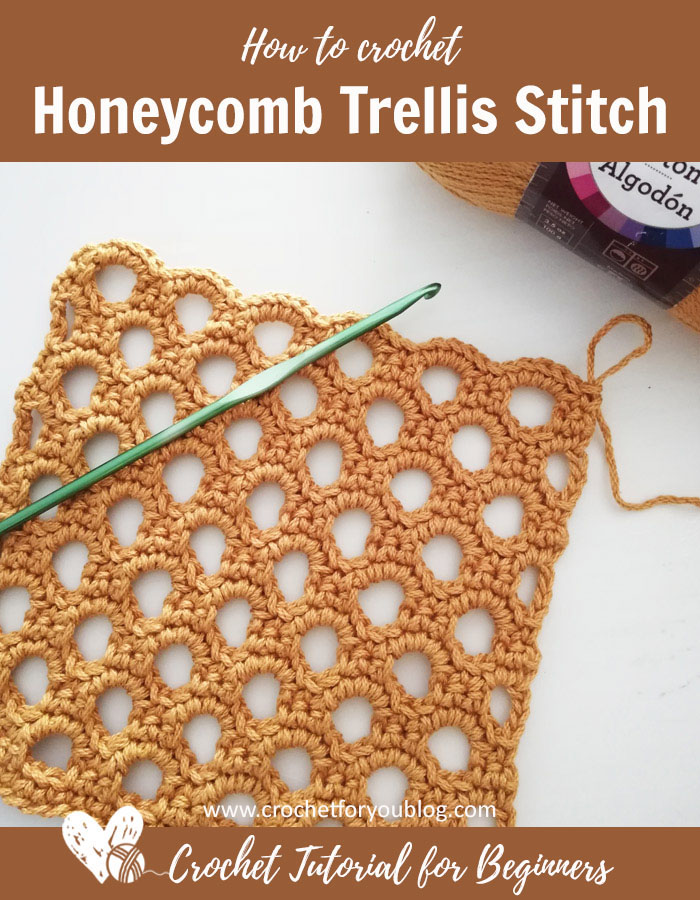
How to Crochet Honeycomb Trellis Stitch
Learning new crochet stitch is like a turning new page of the book of your crochet life. In this chapter, we are going to learn how to crochet honeycomb trellis stitch.
Disclosure This blog contain affiliate links.
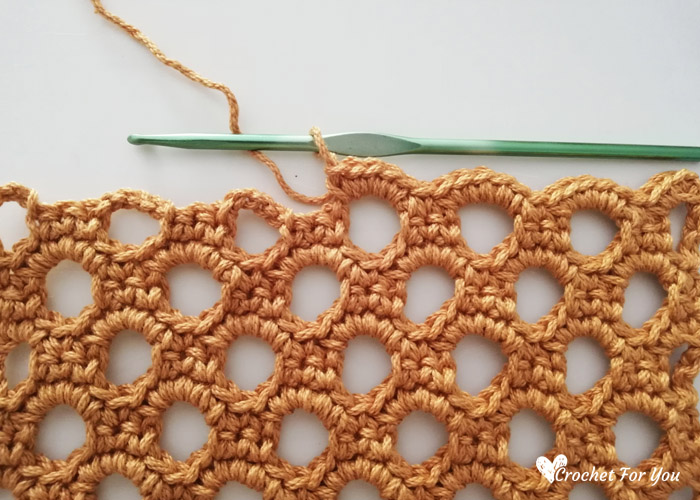
Crochet honeycomb trellis stitch great for market bags, shawls, cover ups and more summer projects.
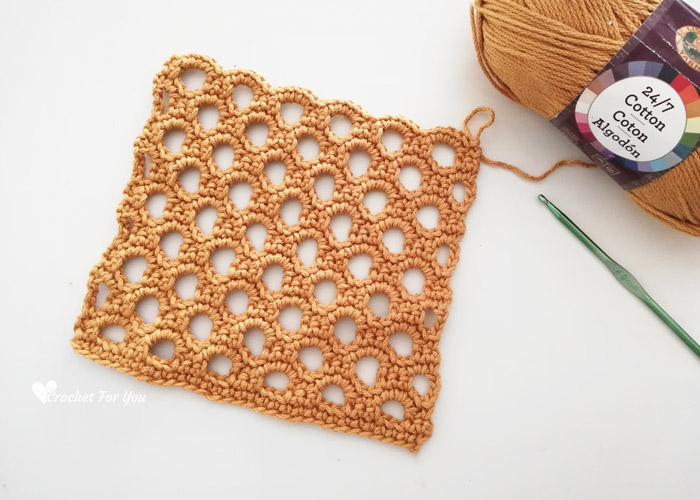
This pretty stitch has a open work and lace texture.
Honeycomb trellis stitch great for working with Cotton or bulkier yarn to keep your crochet project sturdy and shape.
I used Lion Brand 24/7 Cotton yarn
Add this stitch to Ravelry queue
Save on Pinterest
You will need
- Any weight of yarns you wish to use and recommended hook size for the yarn weight you selected.
- You can make this with solid or multiple colors.
- This honeycomb trellis stitch great for working with Cotton or bulkier yarn
I used
- Lion Brand 24/7 Cotton (Affiliate Link)
- US G-6, 4mm crochet hook
And other essential materials and tools like
- Scissors
- Stitch markers
- Measuring tape and
- Yarn needle for weaving ends.
Abbreviations
- ch = chain
- st = stitch
- sk = skip
- sc = single crochet
- tr = treble crochet
- ch-() sp = chain (number of chains) – space
- * to ; = repeat * to the instructions.
How to Crochet Honeycomb Trellis Stitch
Crochet multiple of 5 +2.
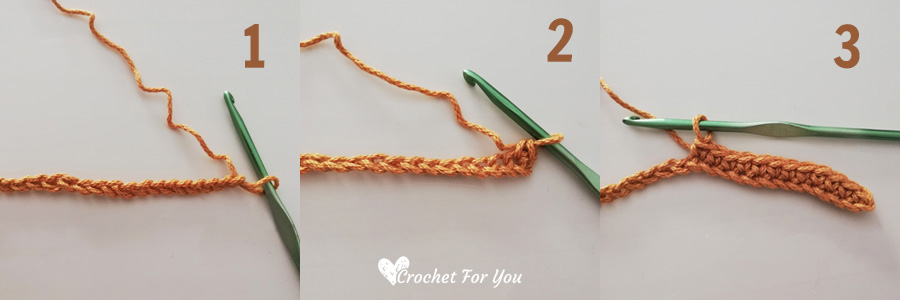
Crochet 32 chains (image 1)
Row 1: sc in 2nd ch from the hook (image 2), sc in each st across (image 3), turn.
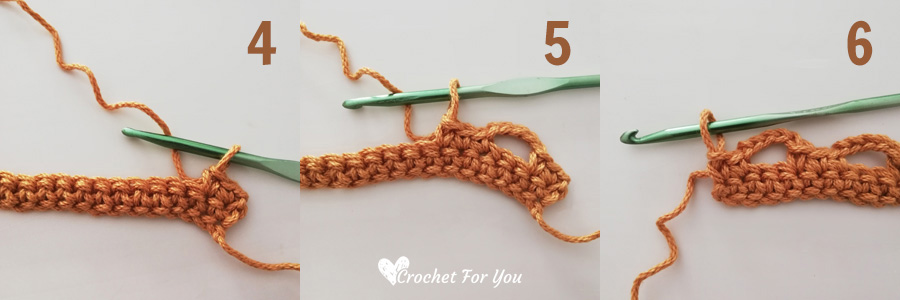
Row 2: ch 1, sc in first st and next st (image 4), *ch 5, sk next 2 st, sc in each of next 3 st (image 5); repeat until last 4 sts remain, ch 5, sk next 2 st, sc in last 2 st (image 6), turn.
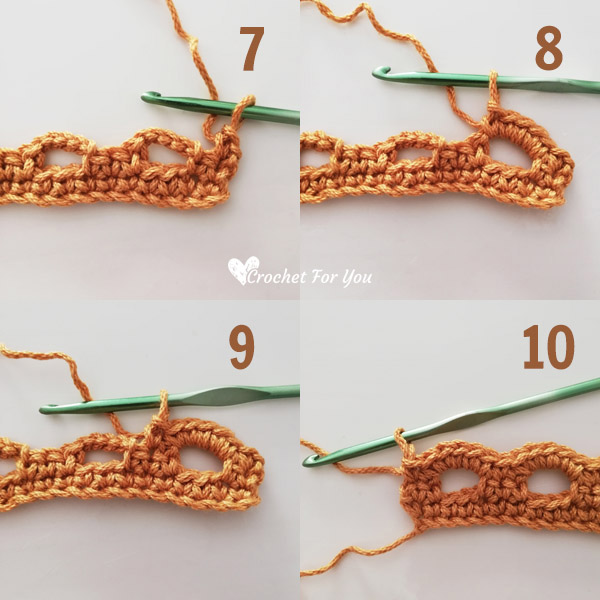
Row 3: ch 1, sc in first sc (image 7), sk next sc, *5 sc in next ch-5 sp (image 8), sk next sc, sc in next sc (image 9), sk next sc; repeat until last 2 sts remain, sk next sc, sc in last sc (image 10), turn.
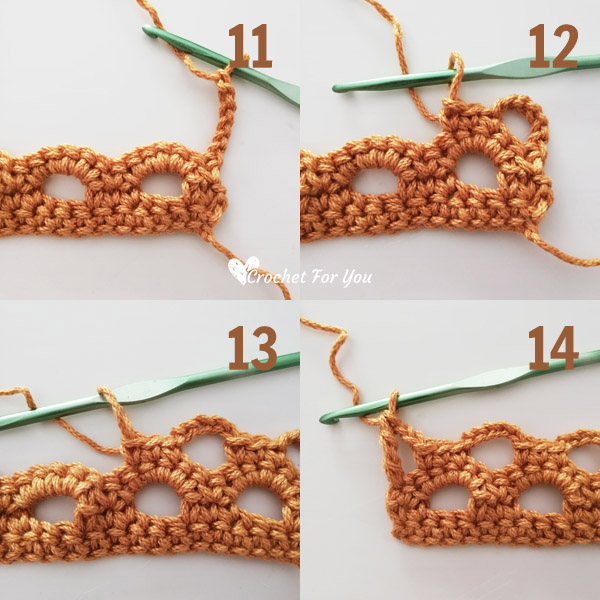
Row 4: ch 6 (count as tr and chain 2) (image 11), sk first 2 sc, *sc in each of next 3 sc (image 12), ch 5, sk next 3 sc (image 13); repeat until last 2 sts remain, ch 2, sk next sc, tr in last sc (image 14).
Row 5: ch 1, sc in first sc, 2 sc in ch-2 sp, *sk next sc, sc in next sc (image 15), sk next sc, 5 sc in ch-5 sp; repeat until last ch-5 sp, sk next sc, sc in next sc (image 16), sk next sc, 2 sc in ch-6 sp, sc in 4th beg ch top (image 17).
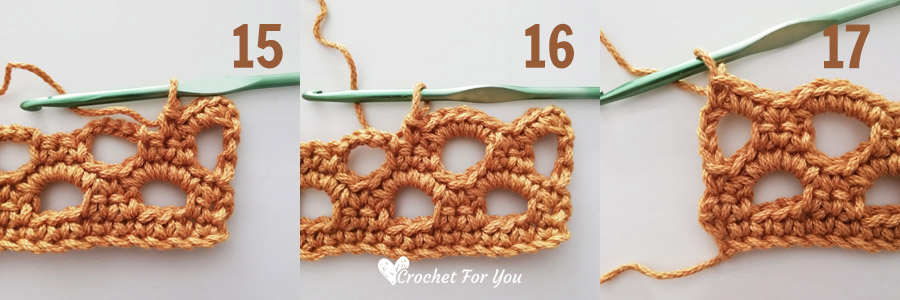
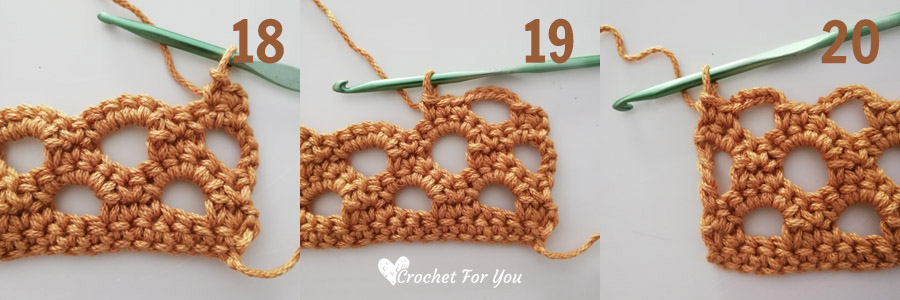
Row 6: ch 1, sc in first sc and next sc (image 18), *ch 5, sk next 3 sc, sc in each of next 3 sc (image 19); repeat until last 5 sts remain, ch 5, sk next 3 sc, sc in last 2 sc (image 20).
Repeat rows 3 to 6 until your desired length.
Hope to see you soon with a new FREE pattern
Until then, Happy Crocheting!!
Share your finished projects of this pattern on Crochet For You FB page.
Happy hooking with Crochet For You!!
Let’s connect and share
Facebook | Pinterest | Twitter | Instagram
All contents include photography and patterns are copyrighted Crochet For You by Erangi Udeshika.
Do not copy, edit, distribute or republish patterns and images in this blog in part or whole as your own. Please, share a direct link to the pattern with others and anywhere else. You are welcome to make and sell finished items using my patterns.
Visit Copyright / Terms of use for more info. Thank you.



One Comment
Roxanne
HI, beautiful design! Do you know how I could make a circular piece for center of my wooden table? thanks much