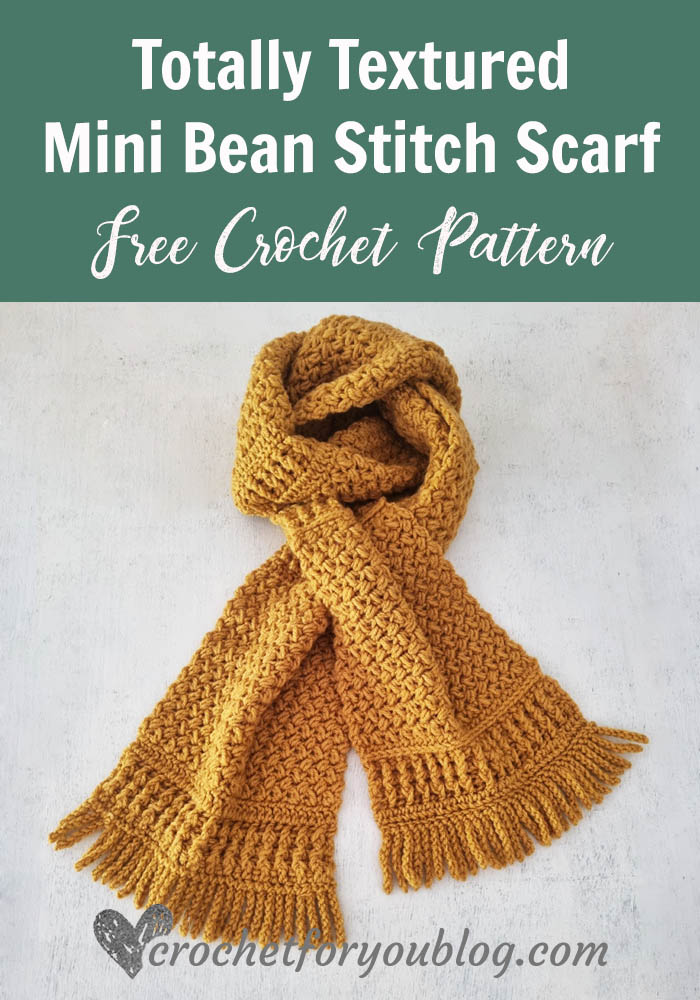
Totally Textured Mini Bean Stitch Scarf
Totally Textured Mini Bean Stitch Scarf Pattern by Crochet For You
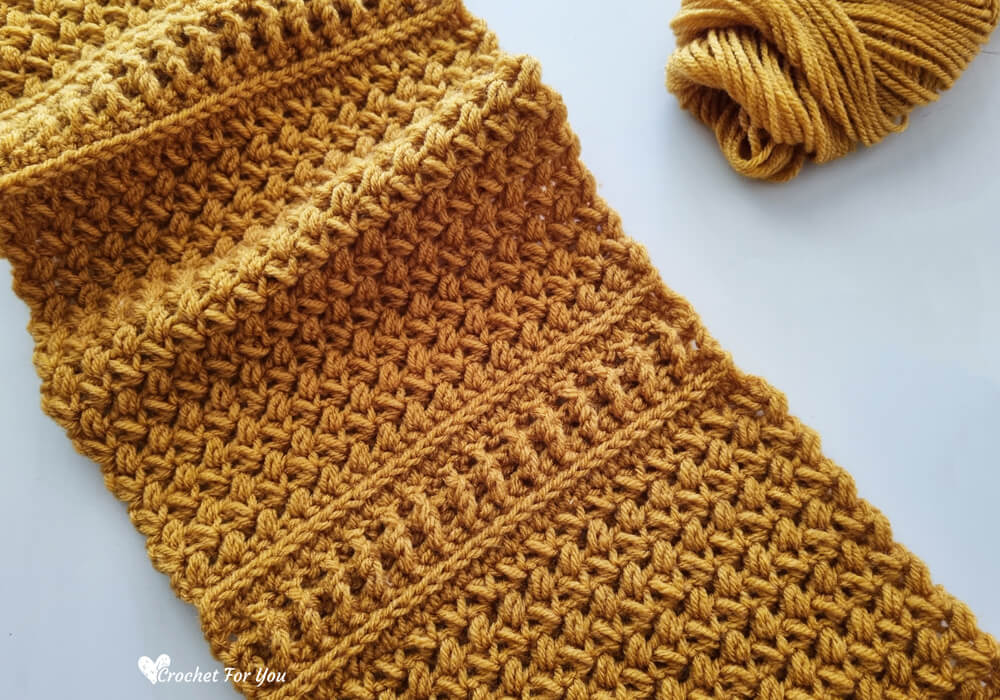
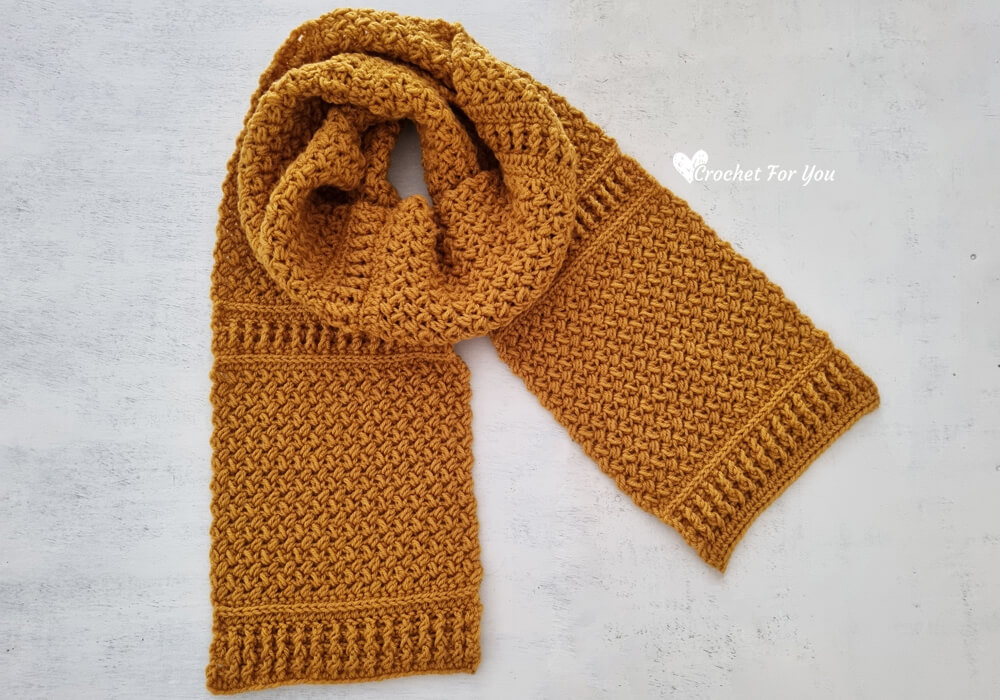
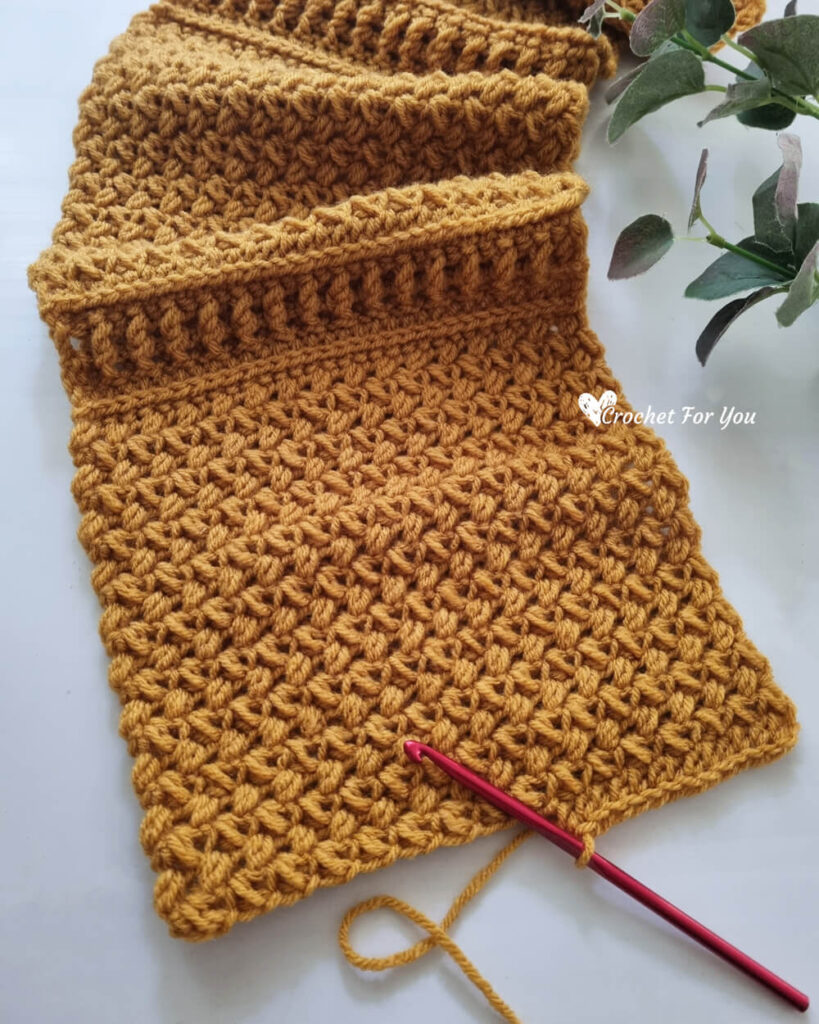
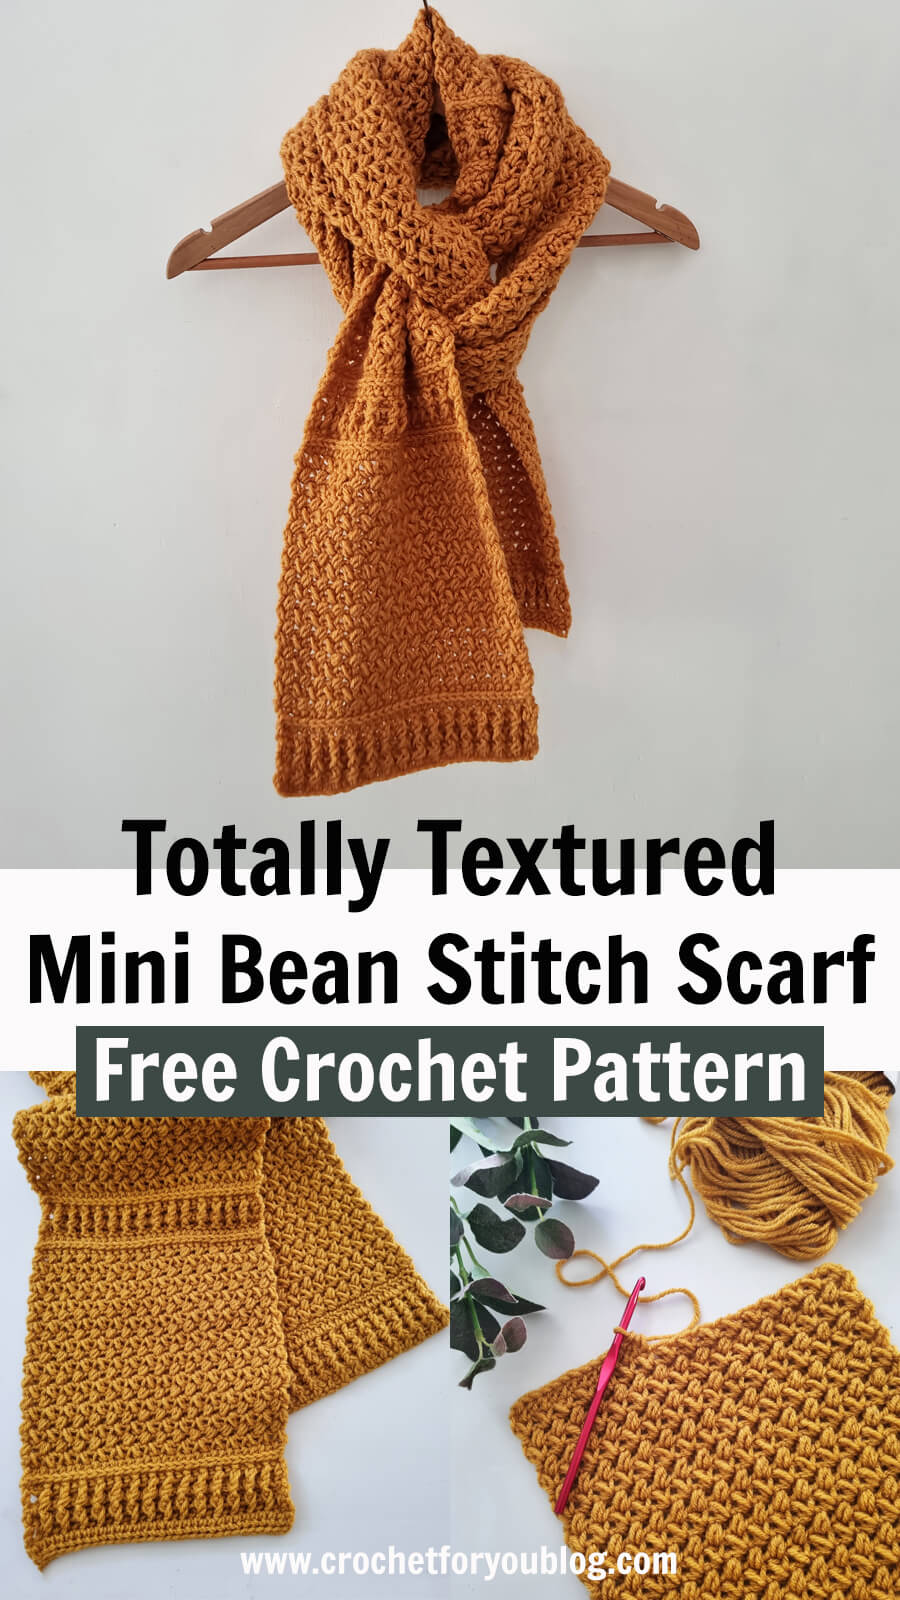
Here is a beautiful textured and a modern scarf pattern to try. This Totally Textured with Mini Bean Stitch Scarf gets a nice texture from the combination of various crochet stitches and techniques. You will love working with these beautiful mini bean stitches while making front post and back post ribbed stripes.
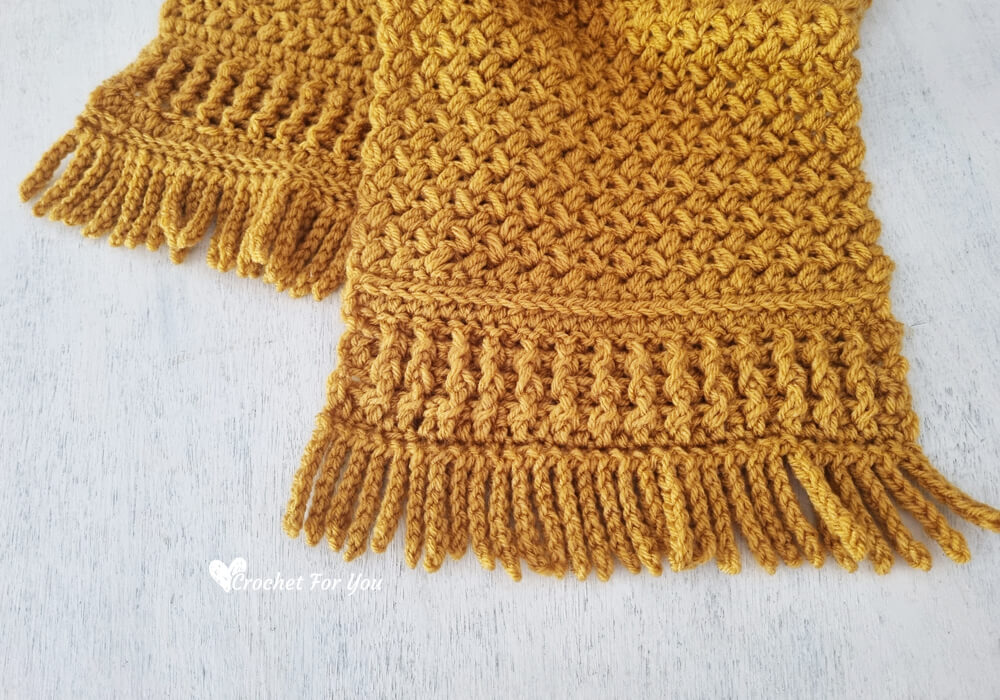
I updated the pattern with fringe. You can find more details below.
Disclosure This blog may contain affiliate links.
Add this pattern to Ravelry queue
Save on Pinterest
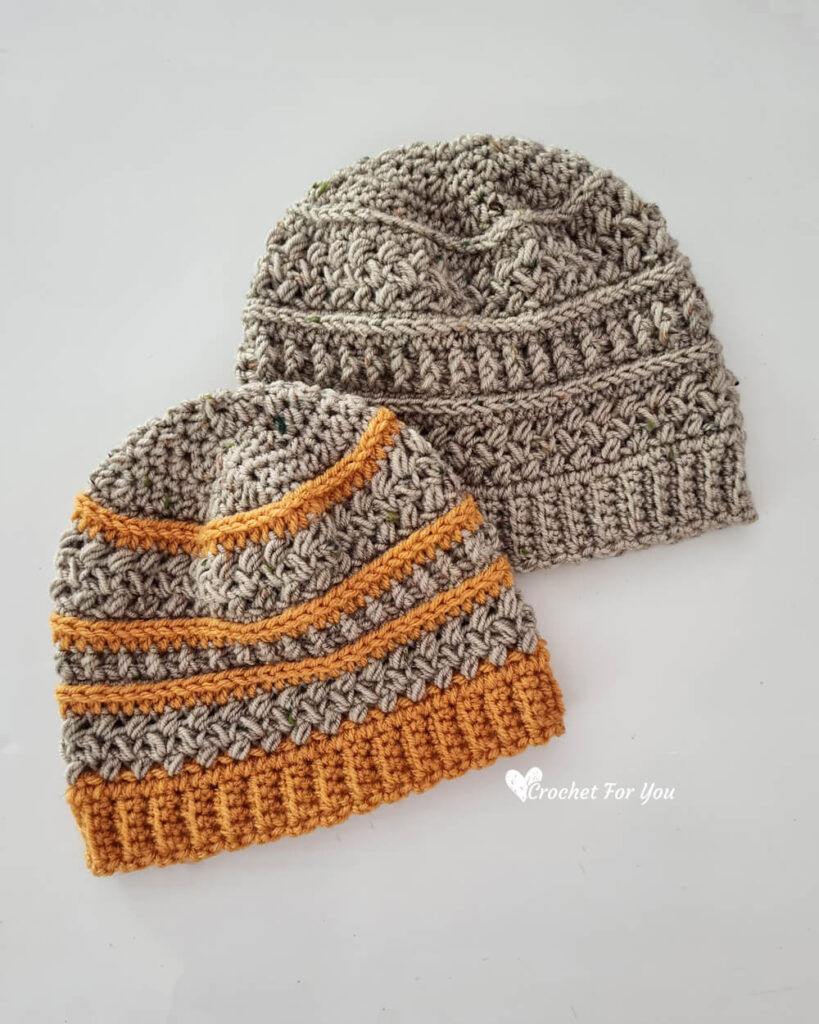
Make a Set of Crochet Beanie & Scarf
This fitted beanie pattern available in Teen and Adult sizes. It’s a unisex design that’s perfectly suitable for boys and girls, men and women.
Totally Textured Mini Bean Stitch Beanie
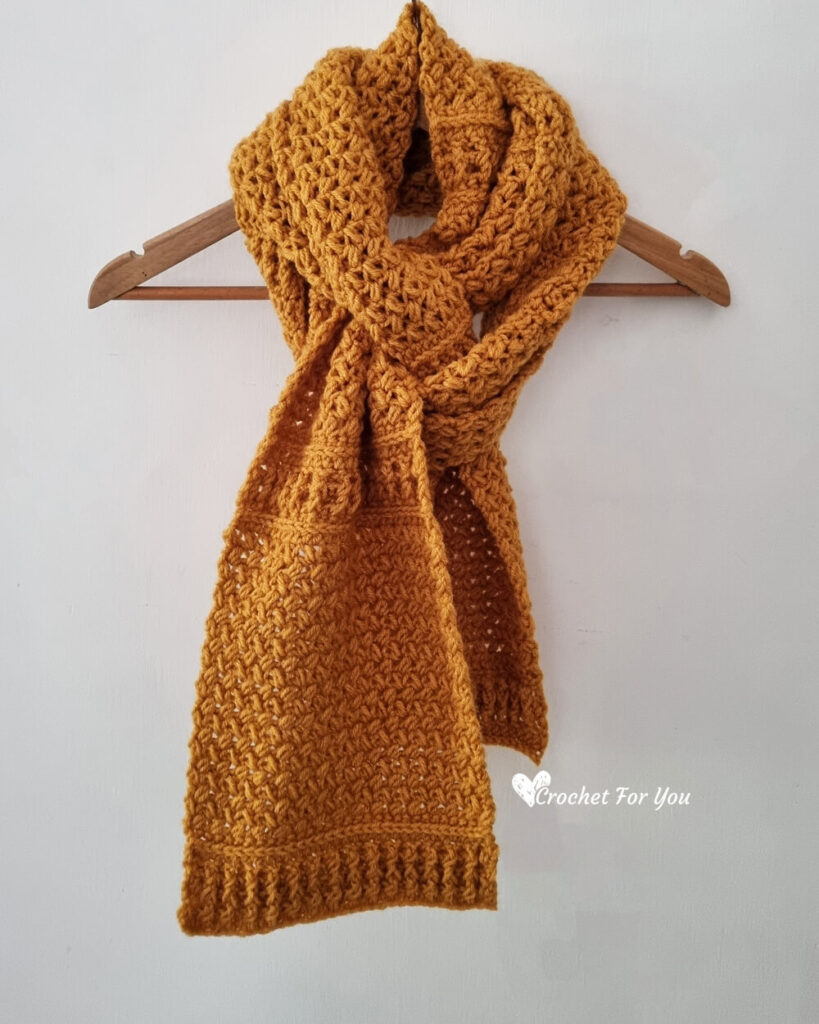
I wanted to make a unisex style scarf that can be used for both men and women. This is a quick crochet project when you grab the pattern rhythm. I feel this scarf is great for working with solid color because it has a wonderful texture to show off.
If you want to adjust the width size of the scarf, crochet multiple of 2 and repeating rows 53 to 78 as much as you want.
Totally Textured with Mini Bean Stitch Scarf
Skill level: Intermediate
Finished size: 8.75″ wide, 74″ long. (This pattern can be adjusted to any size you want)
Material:
– #4 Medium / Worsted weight / 100% acrylic / Approx: 750 yards total
I used
– 2 skeins of Ice yarn Chiclayo (Dark Gold) (100% Acrylic, 100g = 371yd/340m)
– US I-9 (5.5mm) crochet hook
– Tapestry needle for weaving ends
You can use any weight of yarn and crochet hook goes with the yarn you selected.
Gauge: 14 sc x 14.5 rows = 4″ with US I-9 (5.5mm) crochet hook.
Abbreviations (US Term)
- ch = chain
- st = stitch
- sk = skip
- sc = single crochet
- hdc = half double crochet
- dc = double crochet
- BL = back loop
- fpdc = front post double crochet
- bpdc = back post double crochet
- ch-sp = chain space
- * to ; = repeat * to the instructions.
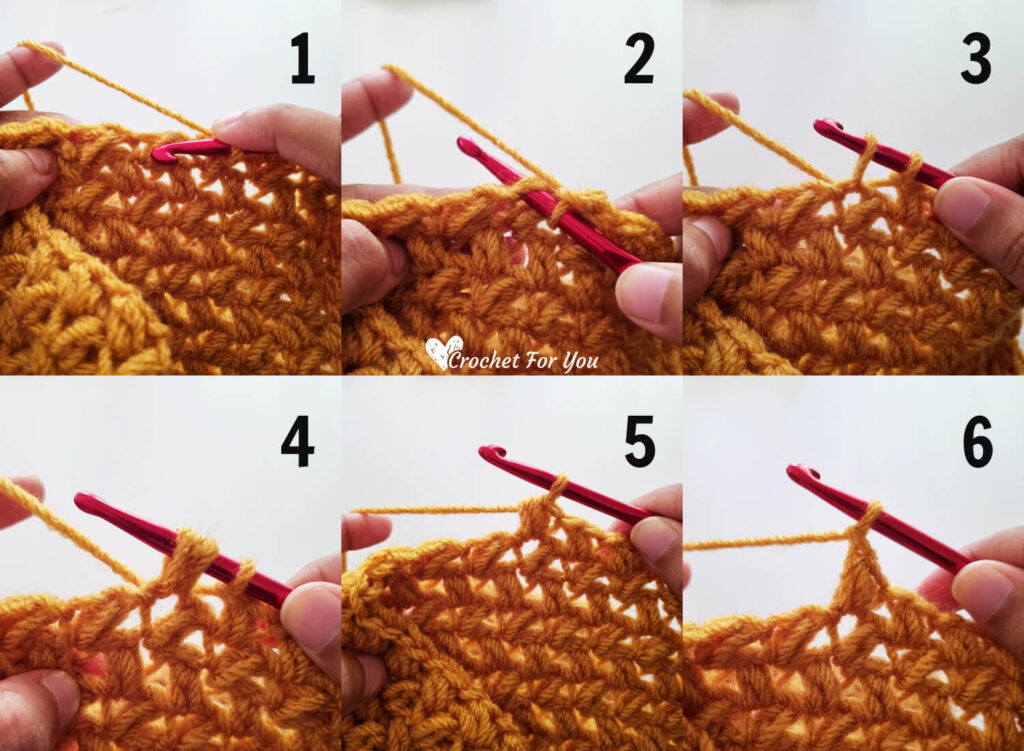
Special stitches (mini bean stitch (mb st)
- Insert the hook in indicated st (image 2)
- Yarn over, pull up a loop (image 3)
- Yarn over, insert the hook into the same stitch, yarn over, pull up a loop (4 loops on the hook) (image 4)
- Yarn over, pull back through all loops on the hook (image 5)
- Chain 1 to close the stitch (image 6)
- (when crocheting mb stitch to the previous mb stitch, work mb st in the small space at the side of the previous mb st (Image 1))
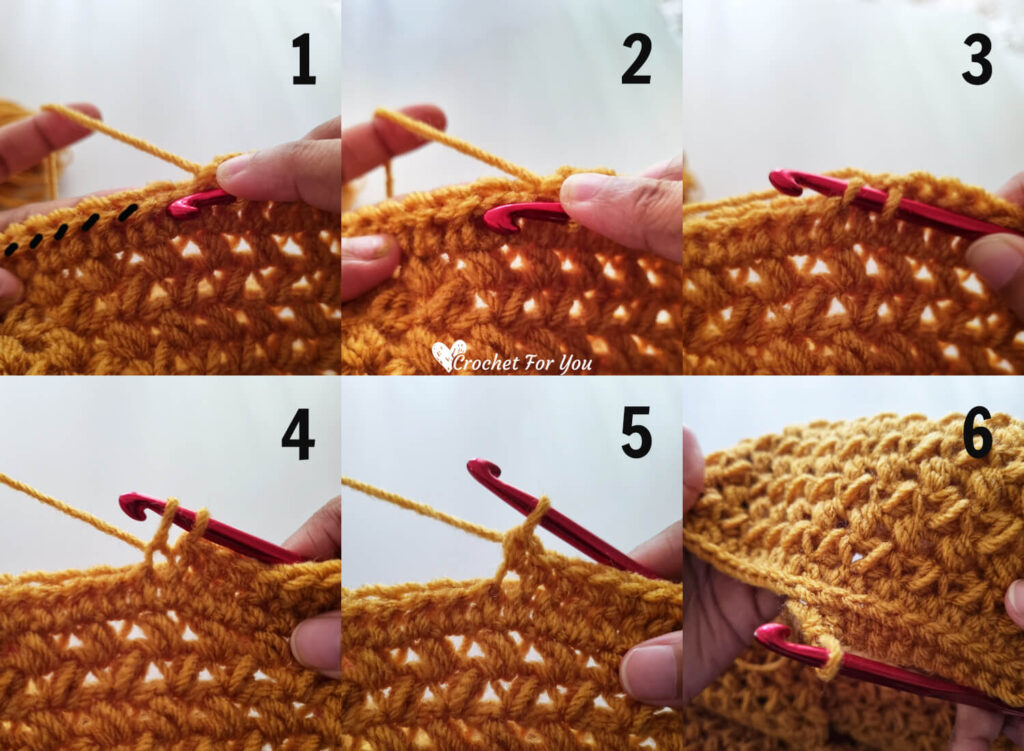
- Sc in 3rd loop (work from the wrong side)
- Instead of working crochet stitches in top loops of the previous round, you should find a 3rd loop on the wrong side or back side of the crochet piece. This 3rd loop is located on the wrong side just under the top 2 loops (image 1 & 2).
- Start to make a crochet stitch you want as normal way. Insert the hook in 3rd loop (image 3).
- Yarn over, pull up a loop (image 4).
- Yarn over, pull back through all the loops on the hook (image 5).
- If you turn the right side of the work you will see the braid-like row of v shapes has created (image 6).
Crochet ch 32 (crochet multiple of 2)
Row 1: hdc in 2nd ch from the hook, hdc in each st across, turn. (31 sts)
Row 2: ch 1, dc in first st, *fpdc in next st, bpdc in next st; repeat * to across until last st remain, dc in last st, turn. (15 fpdc / 14 bpdc / 2 dc)
Row 3: ch 1, dc in first st, *bpdc in next st, fpdc in next st; repeat * to across until last st remain, dc in last st, turn. (14 fpdc / 15 bpdc / 2 dc)
Row 4: ch 1, dc in first st, *fpdc in next st, bpdc in next st; repeat * to across until last st remain, dc in last st, turn. (15 fpdc / 14 bpdc / 2 dc)
Row 5: ch 1, hdc in first st, hdc in each st across, turn. (31 sts)
Row 6: ch 1, (work on 3rd loop from the wrong side – see the special stitches above) sc in first st and each st across, turn. (31 sts)
Row 7: ch 1, MB st in first st (see special stitches above), *sk next st, MB st in next st; repeat * to across, turn. ( 16 sts)
Row 8: ch 1, *MB st in the side of the mb st in the previous row (you can see the small space at the side of the mb st – see special stitches above); repeat * to across, turn. (16 sts)
Row 9 to 26: ch 1, *MB st in the side of the mb st in the previous row (you can see the small space at the side of the mb st – see special stitches above); repeat * to across, turn. (16 sts)
Row 27: ch 1, hdc in first st, hdc in each st across, turn. (31 sts)
Row 28: ch 1, (work on 3rd loop from the wrong side) sc in first st and each st across, turn. (31 sts)
Row 29: ch 1, dc in first st, *bpdc in next st, fpdc in next st; repeat * to across until last st remain, dc in last st, turn. (14 fpdc / 15 bpdc / 2 dc)
Row 30: ch 1, dc in first st, *fpdc in next st, bpdc in next st; repeat * to across until last st remain, dc in last st, turn. (15 fpdc / 14 bpdc / 2 dc)
Row 31: ch 1, hdc in first st, hdc in each st across, turn. (31 sts)
Row 32: ch 1, (work on 3rd loop from the wrong side) sc in first st and each st across, turn. (31 sts)
Row 33: ch 1, MB st in first st, *sk next st, MB st in next st; repeat * to across, turn. ( 16 sts)
Row 34 to 52: ch 1, *MB st in the side of the mb st in the previous row (you can see the small space at the side of the mb st – see special stitches above); repeat * to across, turn. (16 sts)
Row 53 to 58: repeat rows 27 to 32.
Row 59: repeat row 33
Row 60 to 78: repeat row 34.
Row 79 to 84: repeat rows 27 to 32.
Row 85: repeat row 33.
Row 86 to 104: repeat row 34.
Row 105 to 110: repeat rows 27 to 32.
Row 111: repeat row 33.
Row 112 to 130: repeat row 34.
Row 131 to 136: repeat rows 27 to 32.
Row 137: repeat row 33
Row 138 to 156: repeat row 34.
Row 157 to 162: repeat rows 27 to 32.
Row 163: repeat row 33
Row 164 to 182: repeat row 34.
Row 183 to 186: repeat rows 27 to 30.
Row 187: ch 1, dc in first st, *bpdc in next st, fpdc in next st; repeat * to across until last st remain, dc in last st, turn. (14 fpdc / 15 bpdc / 2 dc)
Row 188: ch 1, hdc in first st, hdc in each st across, turn. (31 sts)
Row 189: (working on back loop only) sl st in BL of each st across, Fasten off and weave the end
Updated: Adding Crocheted Fringe
I added crocheted fringe to the scarf for more details. I think it’s perfectly match with the scarf and thought to share with you all.
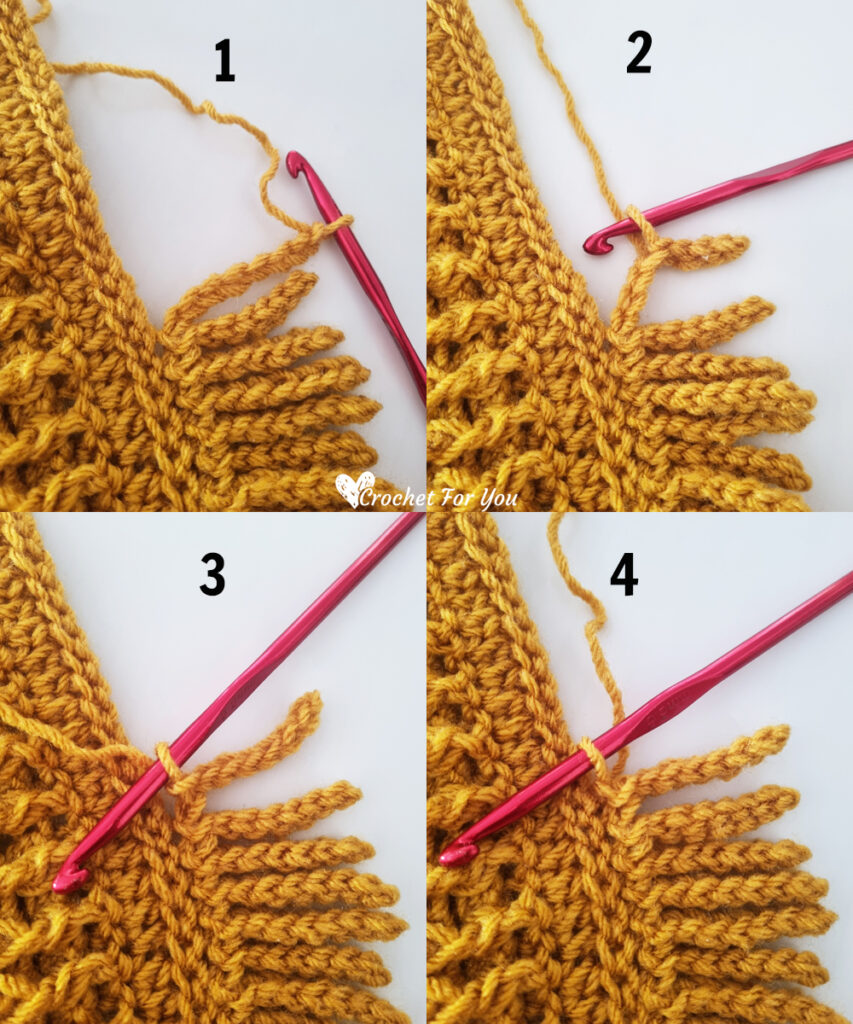
This is an alternative method to add fringe and it’s easy and fast too. See how to add crocheted fringe with step by step photos below.
Do not cut the yarn when you finish the scarf pattern. Turn the work,
Step 1: chain 8 or more (image 1),
Step 2: slip stitch into the 2nd chain, slip stitch in each of next 6 chains (image 2 & 3),
Step 3: slip stitch into the next stitch of the scarf, (image 4)
Repeat steps 1 to 4 until last stitch of the scarf.
Hope to see you soon with a new FREE pattern
Until then, Happy Crocheting!!
Share your finished projects of this pattern on Crochet For You FB page.
Happy hooking with Crochet For You!!
Let’s connect and share
Facebook | Pinterest | Twitter | Instagram
All contents include photography and patterns are copyrighted Crochet For You by Erangi Udeshika.
Do not copy, edit, distribute or republish patterns and images in this blog in part or whole as your own. Please, share a direct link to the pattern with others and anywhere else. You are welcome to make and sell finished items using my patterns.
Visit Copyright / Terms of use for more info.
Thank you.
