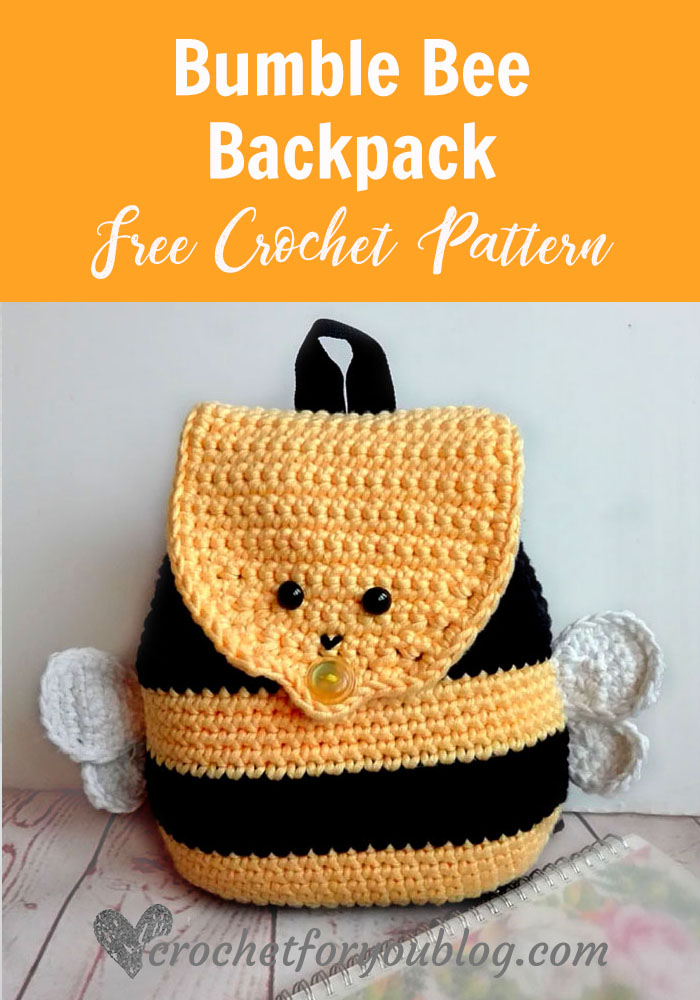
Crochet Bumble Bee Backpack Free Pattern
Crochet Bumble Bee Backpack Pattern by Crochet For You
Looking for a cute backpack for kids? Here is cute looking backpack easy and fast to crochet. 🙂
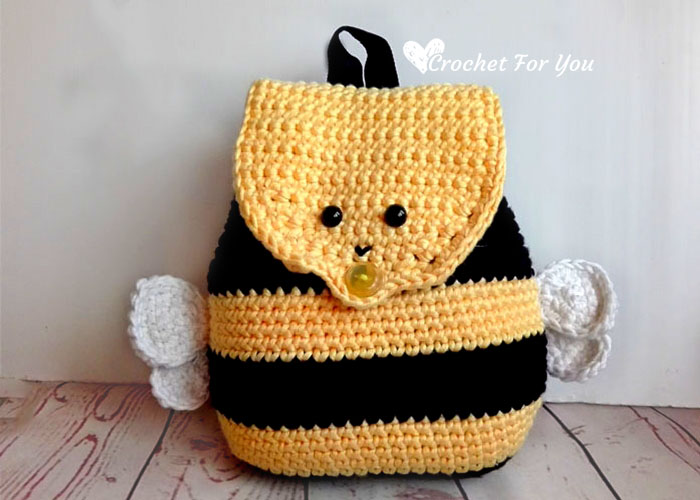
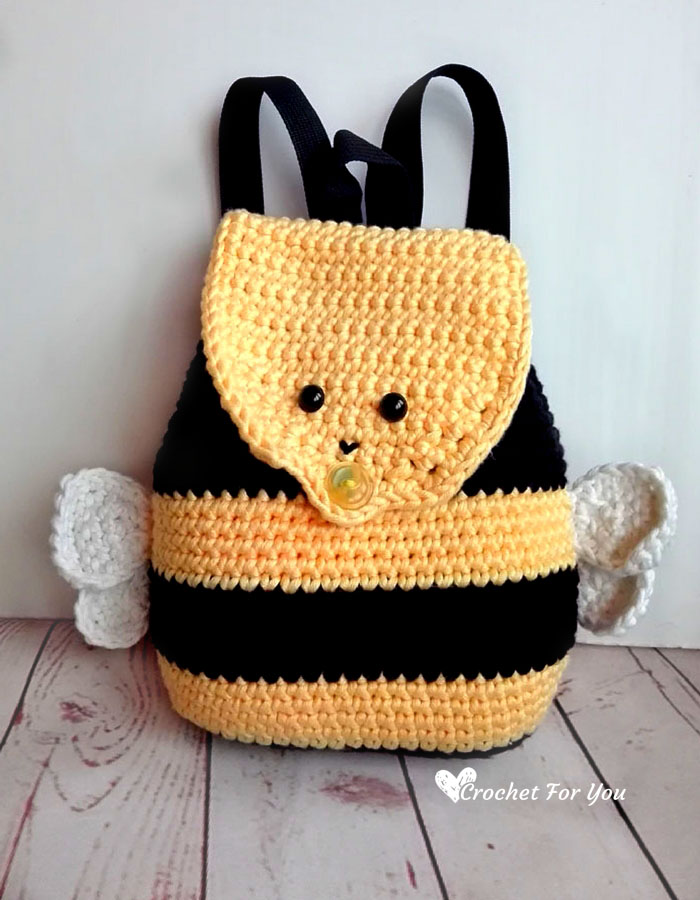
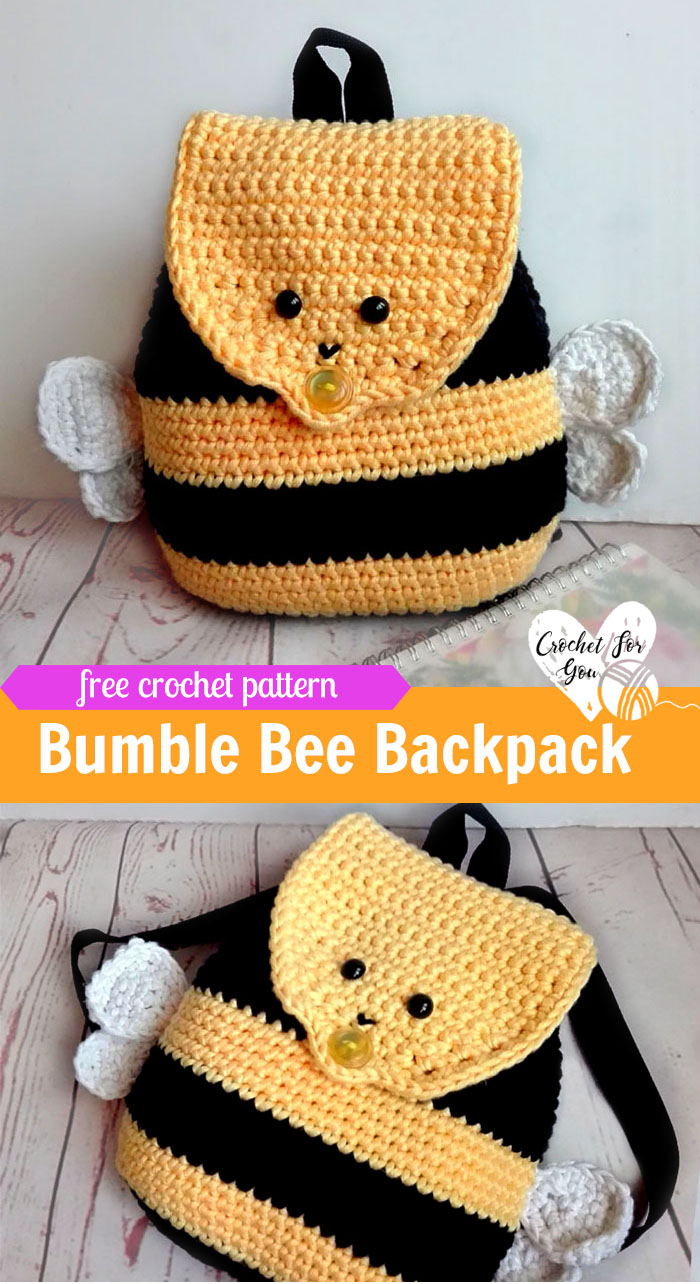
You know my friend, kids are energetic and busy like bees when they are outdoor activities. This little Bumble Bee Backpack is perfect for kids to carry out their own stuff. It has a cute smiling bumble bee face on the flap, yellow and black stripes on the body of the bag and small wings, too. I hope you will love this and make!
Disclosure: This blog contains affiliate links.
Add this pattern to Ravelry queue
Skill level easy
Finished size
- 10.5″ height x 13″ wide including wings.
Materials
-
#4-Medium / Worsted / Cotton / Approx: 135 yards
(I used)
- (C1) 1 skein of Soft Smooth Cotton Natural Double Knitting Wool Yarn Ball Baby Woolcraft 200g – black 60 yards
- (C2) 1 skein of Soft Smooth Cotton Natural Double Knitting Wool Yarn Ball Baby Woolcraft 200g – yellow 75 yards
- Small amount of white yarn
- I-9, 5.5mm crochet hook
- 0.75″ yellow button
- 2 Safety eyes
- Stitch markers
- 20″ long cord for the drawstring / 50″ long strap (I used the straps on old school bag)
- Tapestry needle for weaving ends.
Gauge: 13 sc x 14 rows = 4″ with I-9, 5.5mm crochet hook
Abbreviations
- ch = chain
- sc = single crochet
- st = stitch
- sk = skip
- sl st = slip stitch
- ch-sp = chain space
- beg = beginning
- * to ; = repeat * to the instructions.
- [] = work instructions within brackets as many times as directed
- (RS) = right side
- (WS) = wrong sie
- (C1) = color 1
- (C2) = color 2
Special stitches
- Sc2tog = [Insert hook in next st and draw up a loop] 2 times, yarn over, pull back through all 3 loops on hook at once.
Notes
- Beg ch does not count as st.
Bumble Bee Backpack Pattern
With (C1), ch 16,
Round 1: 3 sc in second ch from the hook, sc in each of next 13 st, 3 sc in last st, working on opposite side of the foundation chain. sc in each of next 13 st, sl st to the first st. (32 sts)
Round 2: ch 1, 2 sc in first st and each of next 2 sts, sc in each of next 13 sts, 2 sc in each of next 3 sts, sc in each of next 13 sts, sl st to the first st. (38 sts)
Round 3: ch 1, sc in first st, 2 sc in next st, [1 sc in next st, 2 sc in next st] 2 times, sc in each of next 13 sts, [1sc in next st, 2 sc in next st] 3 times, sc in each of next 13 sts, sl st to first st. (44 sts)
Round 4: ch 1, sc in first st and each of next 2 sts, 2 sc in next st, 1 sc in next st, 2 sc in next st, sc in each of next 19 sts, 2 sc in next st, 1 sc in next st, 2 sc in next st, sc in each of next 16 sts, sl st to the first st. (48 sts)
Round 5: ch 1, sc in first st and each st around, sl st to the first st. (48 sts)
Round 6: with (C2) ch 1, sc in first st and next 3 sts, 2 sc in next st, 1 sc in next st, 2 sc in next st, sc in each of next 21 sts, 2 sc in next st, 1 sc in next st, 2 sc in next st, sc in each of next 17 sts, sl st to the first st. (52 sts)
Round 7: ch 1, sc in first st and each st around, sl st to the first st. (52 sts)
Round 8: ch 1, sc in first st and next 4 sts, 2 sc in next st, 1 sc in next st, 2 sc in next st, sc in each of next 23 sts, 2 sc in next st, 1 sc in next st, 2 sc in next st, sc in each of next 18 sts, sl st to the first st. (56 sts)
Round 9: ch 1, sc in first st and each st around, sl st to the first st. (56 sts)
Round 10: ch 1, sc in first st and next 5 sts, 2 sc in next st, 1 sc in next st, 2 sc in next st, sc in each of next 25 sts, 2 sc in next st, 1 sc in next st, 2 sc in next st, sc in each of next 19 sts, sl st to the first st. (60 sts)
Round 11: (C1) ch 1, sc in first st and each st around, sl st to the first st. (60 sts)
Round 12 to 15: repeat round 11.
Round 16 to 20: repeat round 11 with (C2)
Round 21 to 33: repeat round 11 with (C1)
Round 34: ch 1, sc in first st and next st, ch 2, sk next 2 sts, sc in each of next 4 sts, ch 2, sk next 2 sts, sc in each of next 8 sts, ch 2, sk next 2 sts, sc in each of next 4 sts, ch 2, sk next 2 sts, sc in each of next 6 sts, ch 2, sk next 2 sts, sc in each of next 4 sts, ch 2, sk next 2 sts, sc in each of next 8 sts, ch 2, sk next 2 sts, sc in each of next 4 sts, ch 2, sk next 2 sts, sc in each of next 4 sts. (8 ch-sp(s) / 44 sc total)
Round 35: ch 1, sc in each st across including chain spaces (crochet 2 sc in each ch-sp). (60 sts)
Round 36: ch 1, sc in first st and each st around, sl st to the first st. (60 sts) Attach stitch markers on the 8th st and 51st st.
Flap (Between marked stitches)
Row 1: with (C2), Right side facing out, start at the one of marked st, ch 1, sc in first st and each 18 sts (the last st should be on the other side marked st), turn. (18 sts)
Row 2: ch 1, sc in first st and each st across, turn. (18 sts)
Row 3 to 13: repeat row 2.
Row 14: ch 1, sc in first st, sc2tog, sc in each of next 12 sts, sc2tog, sc in last st, turn. (16 sts)
Row 15: ch 1, sc in first st and each st across, turn. (16 sts)
Row 16: ch 1, sc in first st, sc2tog, sc in each of next 10 sts, sc2tog, sc in last st, turn. (14 sts)
Row 17: ch 1, sc in first st, sc2tog, sc in each of next 8 sts, sc2tog, sc in last st, turn. (12 sts)
Row 18: ch 1, sc in first st, sc2tog, sc in each of next 6 sts, sc2tog, sc in last st, turn. (10 sts)
Row 19: ch 1, sc in first st, sc2tog, sc in each of next 2 sts, ch 4, sc in each of next 2 sts, sc2tog, sc in last st, turn. (8 sts)
Edging: Right side facing) Start at row 1 of the flap. Crochet sc around the edge including chains spaces of the flap. Start at row 1 of the flap. 2 sc in random stitch on curve side to make a smooth edge. Fasten off weave the end.
Wings
Large: (make 2)
Ch 5
Row 1: 2 sc in second ch from the hook, sc in each of next ch 2, 2 sc in next st, turn. (6 sts)
Row 2: ch 1, sc in each st across, turn. (6 sts)
Row 3: repeat row 2.
Row 4: ch 1, sc in first st, [sc2tog] 2 times, sc in last st, turn. (4 sts)
Row 5: ch 1, [sc2tog] 2 times.
Edging: Crochet sc around the edge. Add 2 sc in random stitch on curve side to make a smooth edge. Fasten off weave the end.
Small: (make 2)
ch 4
Row 1: sc in second ch from the hook, sc in each of next 2 sts, turn. (3 sts)
Row 2: 2 sc in first st, sc in next ch, 2 sc in next st, turn. (5 sts)
Row 3: ch 1, sc2tog, sc in next st, sc2tog, turn. (3 sts)
Row 4: 3sctog. Fasten off and weave the end.
Edging: Crochet sc around the edge. Add 2 sc in random stitch on the curve side to make a smooth edge. Fasten off weave the end.
Assembly
RS facing, place safety eyes between rows 15 and 16 on the flap. And stitch mouth below the eyes.
Wings: Sew large and small wings on two sides of the bag. (See the photo above)
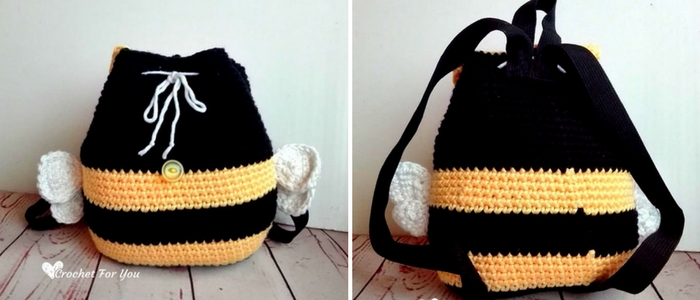
Drawstring: Cut a 20″ long cord and weave in and out of Round 34 every chain spaces.
Sew button between rows 20 and 21 in the middle of the front side of the bag.
Shoulder straps: I got these straps from old school bag. 😀 First I sew about 9″ long strap to make a loop between two holes on the top of the back. And attached 19″ long two straps as shown in the photo above (upper straps on between two holes and the lower straps on row 4 at the bottom corners).
Hope to see you soon with a new FREE pattern ?
Until then, Happy Crocheting!!
Share your finished projects of this pattern on Crochet For You FB page.
Happy hooking with Crochet For You!!
Let’s connect and share
Facebook| Pinterest | Twitter | Instagram
All contents include photography and patterns are copyrighted Crochet For You by Erangi Udeshika.
Do not copy, edit, distribute or republish patterns and images in this blog in part or whole as your own. Please, share a direct link to the pattern with others and anywhere else. You are welcome to make and sell finished items using my patterns.
Visit Copyright / Terms of use for more info. Thank you.
17 Comments
E
Love this pattern, its so cute! Very well written also 🙂
Cintia
Hello
I love this pattern I’am maken it for my granddaughter but am stuck right we’re it says Crochet between markers that’s we’re flap start I’am very confused is there any way you can explain to me because I really don’t onderstand that’s row 1 starting the flap
Thanks Cintia Levy
Erangi Udeshika
Hi Cinta, In round 36 the last round of the bag, you will see the bolded texts where should add the stitch markers. >> Attach stitch markers on the 8th st and 51st st. So the flap should start in these marked stitches including 8th and 51 st. 🙂 I hope you can understand.
BRENDA ROCKSTROH
I am with Cinta in her confusion. There are more then 18 stitches between 8 and 15 so how do I only get 18 stitches?
Erangi Udeshika
You need to attach stitch markers on 8 and 51 sts NOT 15. 🙂
Maria Ortiz
7WOULD BE NICE IF THIS WAS PRINTER FRIENDLY
Deborah Stewart
Thanks for sharing your pattern – it is SO cute!
D.
Erangi Udeshika
Thank you. 🙂 So glad you like it.
Melodie
I’m thinking instead of straps from old backpacks maybe crochet thick ones with material inside strap (to keep from stretching)
Possible??
Erangi Udeshika
Yes, it is possible. And the great idea, too. 🙂
Pingback:
Barbara Means
Have a qurstion. After you ch 16 do you slip stitch before you star round 1?
Erangi Udeshika
No, you are going to work both sides of the foundation chains.
Alice Lee
I’m too am confused about the markers..my flap is not centered it is to the side.
Alice
I have finished my edgeing then realized I don’t have a button hole where did I miss making one . What row. Love the pattern .
Erangi Udeshika
Hi Alice, if you followed the Round 34 correctly. You will have chain spaces to weave in and out the drawstring.
Cindy
I made it I understand it just fine I messed up on the face lol but it’s a great pattern thank you for sharing my daughter just loves it already before even done for the one I write to I can help you make your stamps for your pattern I made my own thank you